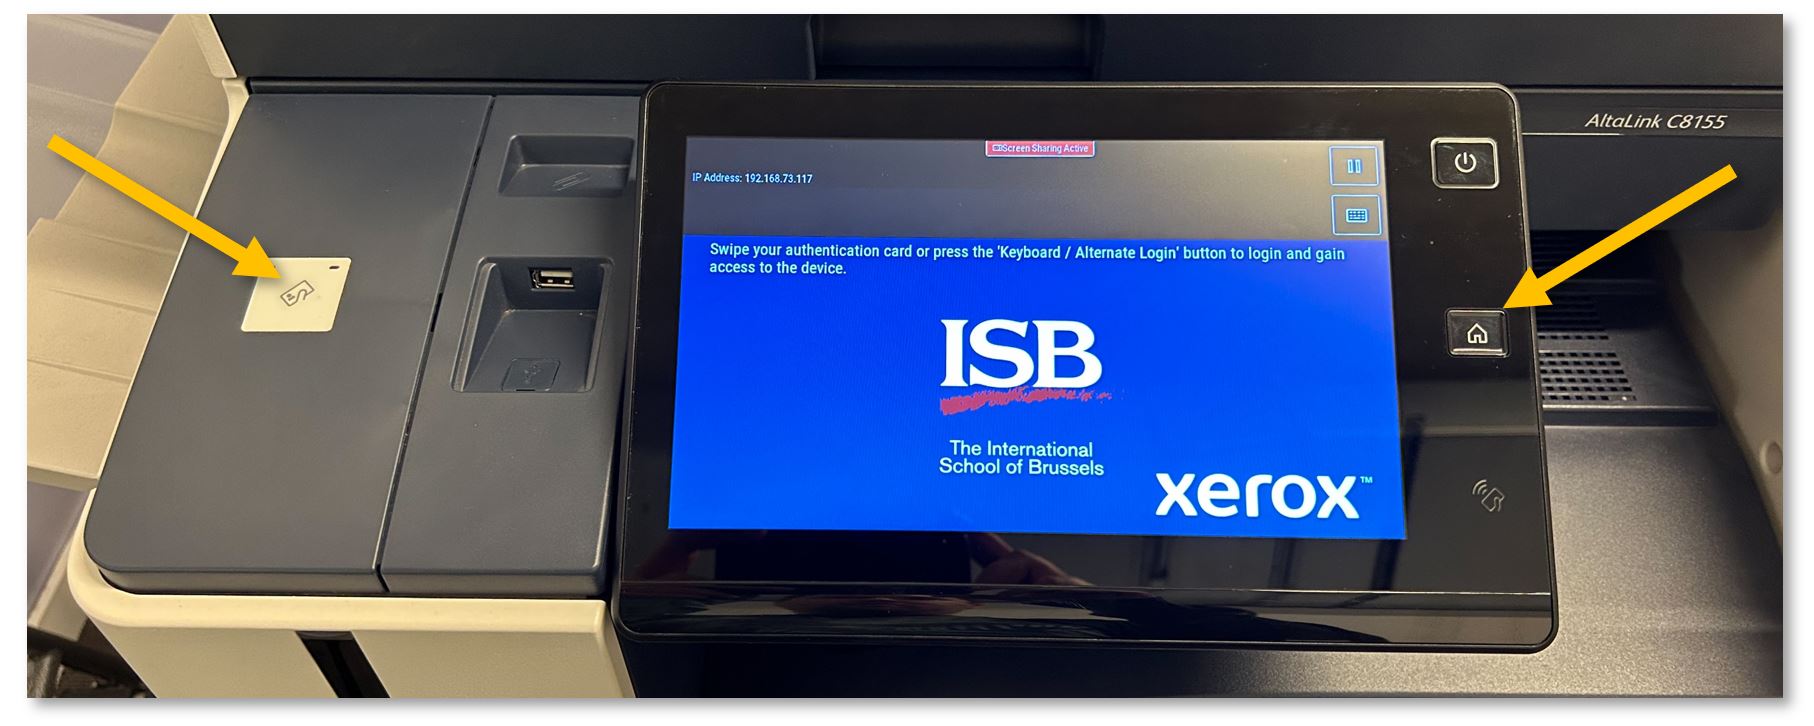
| If the copier is on standby, scan your card or press the Home button to wake it up.
[](https://docs.isb.be/uploads/images/gallery/2023-10/WldgKuzfQKhtsHRp-login.JPG)
|
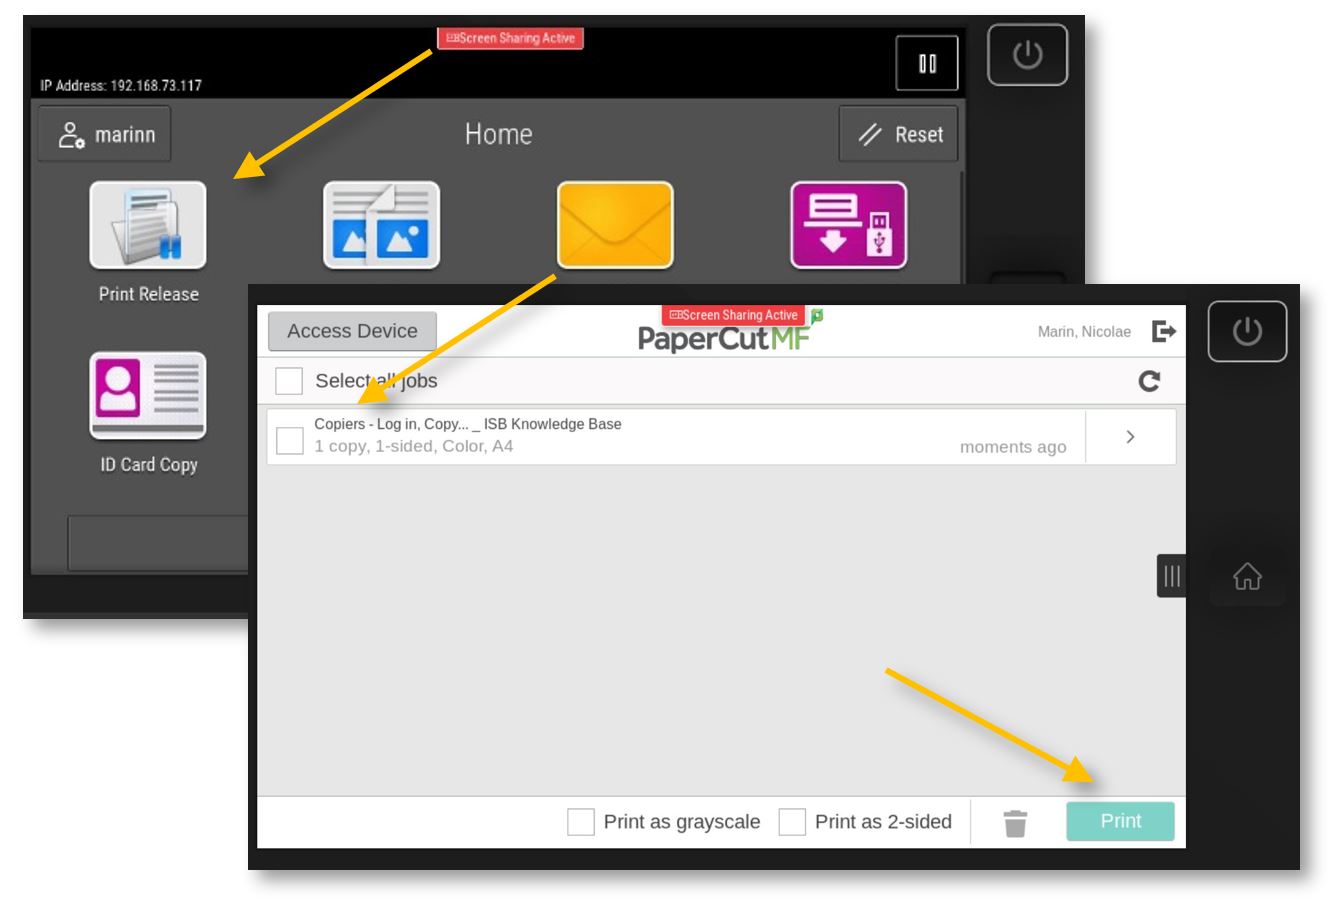
| **Print** Release:
***Computer****: if not already the default, select the '**XeroX-Papercut**' printer and press **Print**.*
- *If XeroX-Papercut is not on your list of printers, please install it from Self-Service - **[click here](https://docs.isb.be/books/employees/page/xerox-paparcut-missing-install-it-from-self-service "install XeroX")** for a visual how-to. For Windows machines, please **[click here](https://docs.isb.be/books/isb-repository/page/xerox-paparcut-missing-on-windows-install-it-from-paper "install for Windows")**.*
- *Printing only works if connected to the ISB network.*
- *On Macs, the first time you print, Papercut will require your password. Do not forget to mark 'Remember this password.' If the password window does not pop up or your print jobs are stuck saying 'Hold for Authentication,' **[click here](https://docs.isb.be/books/employees/page/xerox-printing-jobs-stuck-in-the-queue-fixes "printing fixes")** for a visual fix.*
**Copier**: Swipe your card to log in and select the **Print Release** option. Select the job that you want to print and press **Print**.
Log out by pressing your name, the sign-out icon next to your name, or by swiping your card again.
| [](https://docs.isb.be/uploads/images/gallery/2023-10/gZnnY6cstJIMTOEQ-print.JPG)
|
| **Copy**:
Swipe your card to log in and select the **Copy** option.
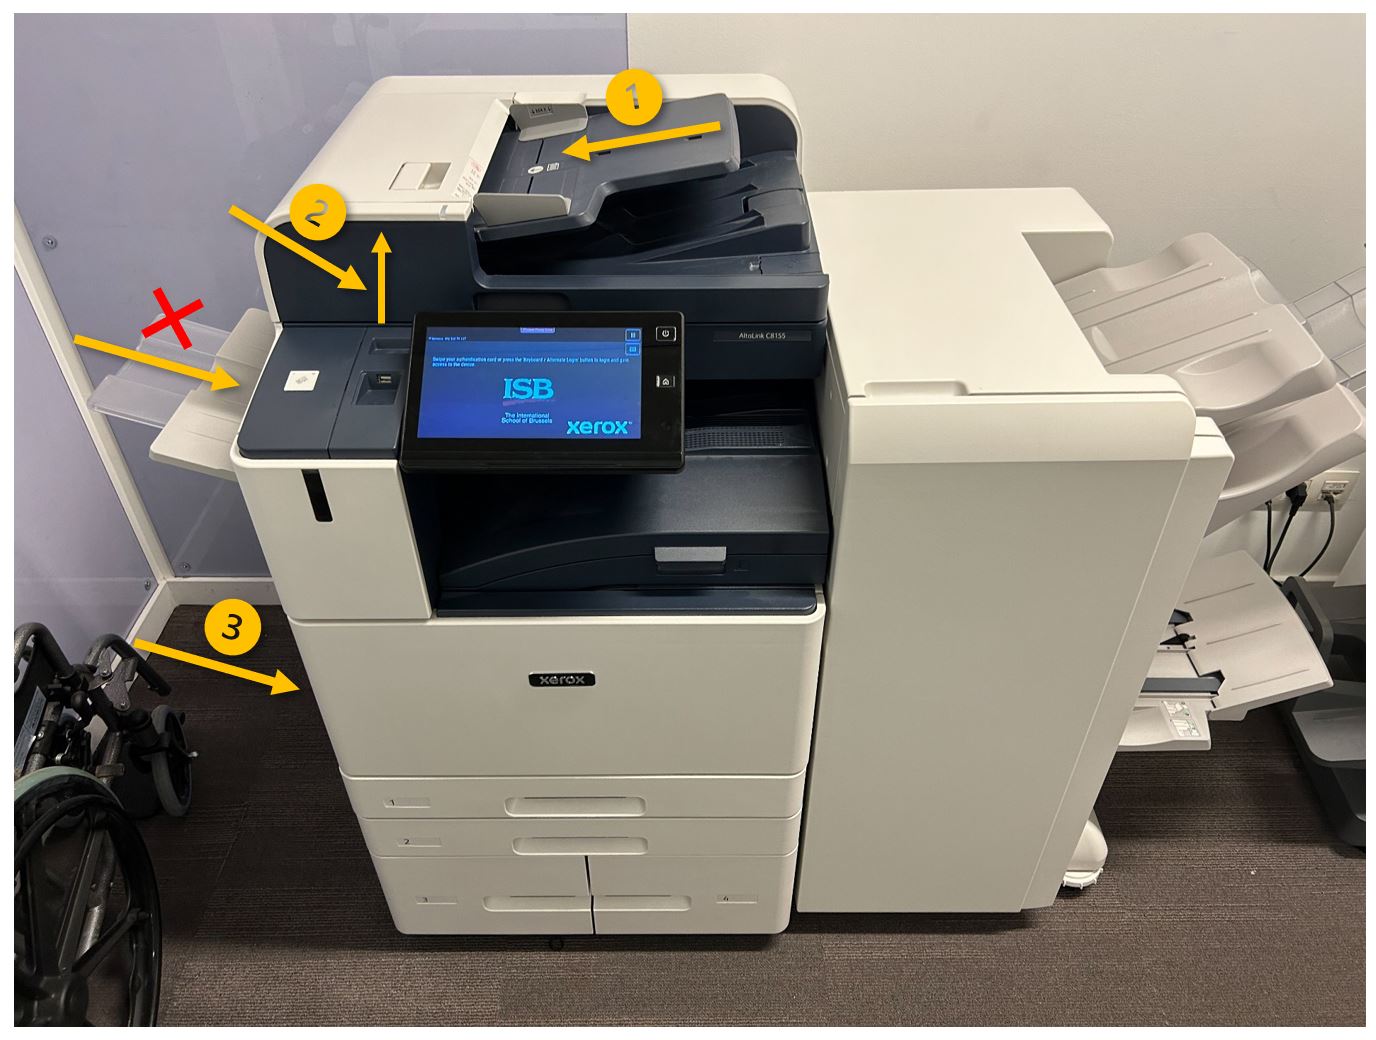
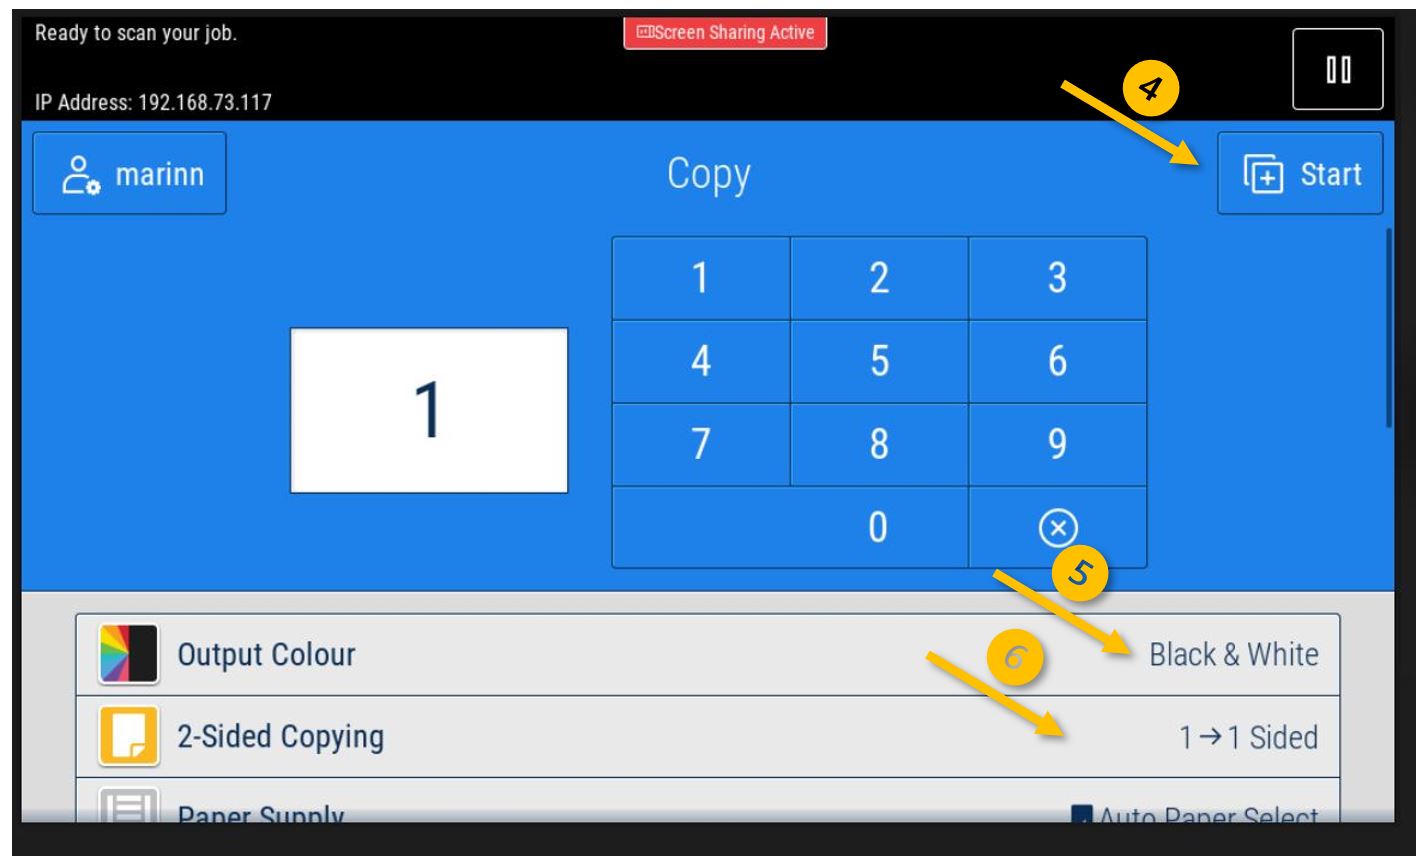
Put the document you want to copy in the tray that will give you the best/fastest results (arrows **1** or **2**), and press **Start** (**4**).
For simple pages that are not stapled, creasy, too thick, etc., you can use the **ADF** (automatic document feeder) on top of the copier (**1**). The ADF will rapidly scan all the pages. To **scan both sides automatically**, press the '2-Sided Copying” option (**6**) on the display and change it as desired.
If your document is a book, maybe it is stapled, you need/want to use multiple small pages at once, etc., please open the lid and place the original/s on the glass (**2**).
If you want the results on a different type of paper (thicker, colored, labels, etc.), please open and use the side tray (**3**), which you can find underneath the small tray noted with **X** (the X tray is used for faxes). Please remember that once this tray is opened, the copier will prioritize it.
Copying defaults to black and white; you can change to color from the Output Colour (**5**) option.
If you scroll down, you can find more interesting options, like **[Reduce/Enlarge](https://docs.isb.be/books/isb-repository/page/xerox-copiers-enlargereduce "Reduce/Enlarge")**, Finishing (staples, hole punch, folding), or **[Booklet Creation](https://docs.isb.be/books/employees/page/xerox-copiers-booklets "Xerox Copiers - Booklets")**. Mirror Image, Book Copying, or Page Layout (for when you want multiple pages on the same page). ETC.
| [](https://docs.isb.be/uploads/images/gallery/2023-11/ZwtveKubgvMDLYeF-copier-b.JPG)
[](https://docs.isb.be/uploads/images/gallery/2023-10/QD3ctb2wZXKJBlnp-copy-interface.JPG)
|
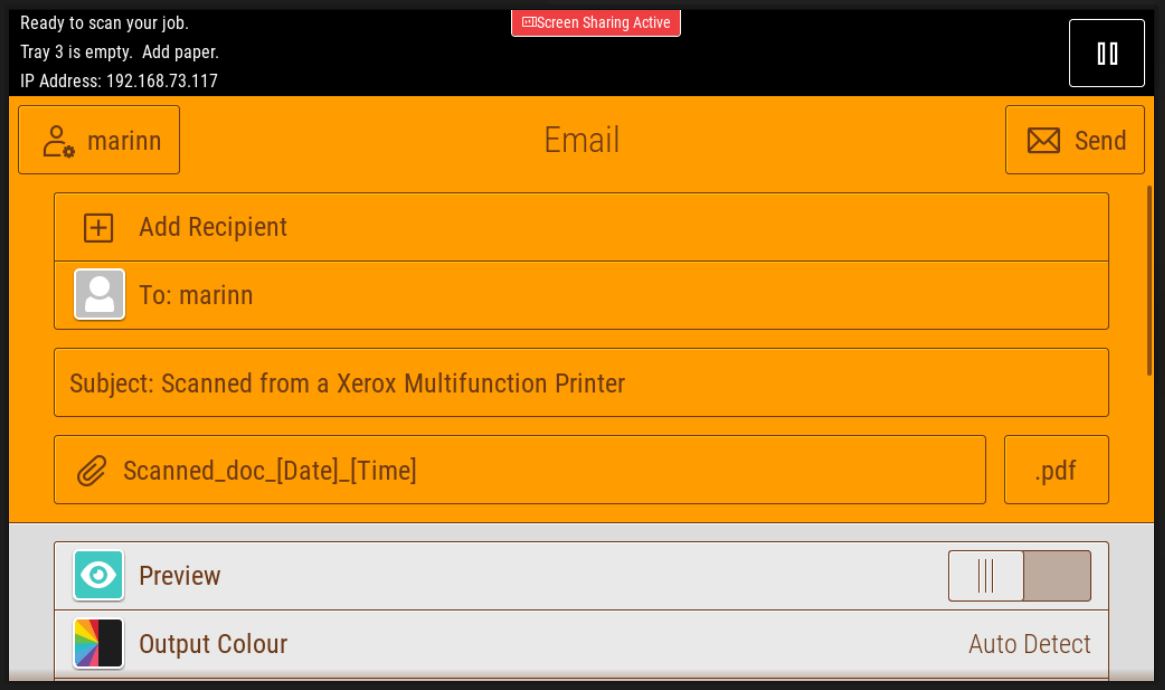
| **Scan to Email:**
Swipe your card to log in and select the **Email** option.
Press **Send**, and the Copier will scan all the pages in the ADF or the one from the glass. A PDF will be sent automatically to your email.
The '**To:**' field is automatically set to your email; if you want to send the email to somebody else (it only works internally), you can add it/them to the Cc or the Bcc by pressing the '**Add Recipient**' field. You can erase your email and add a different one if you click the 'To:' field. You can also change the 'Subject:' with something more meaningful.
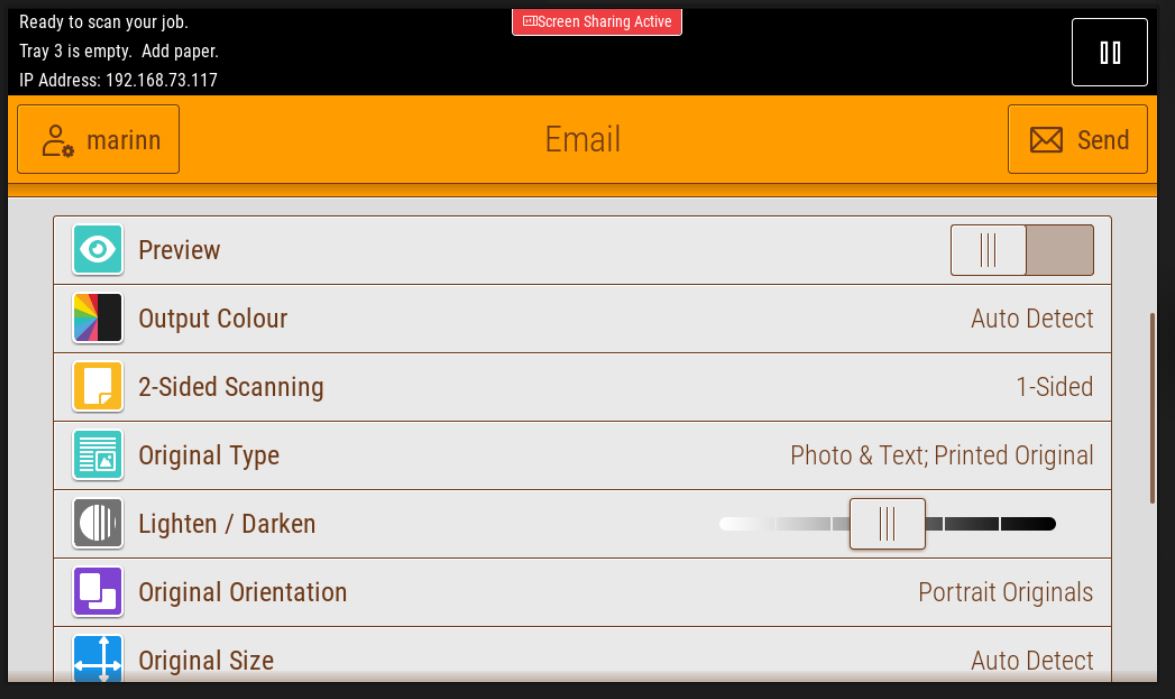
Under Options, you can find more interesting options:
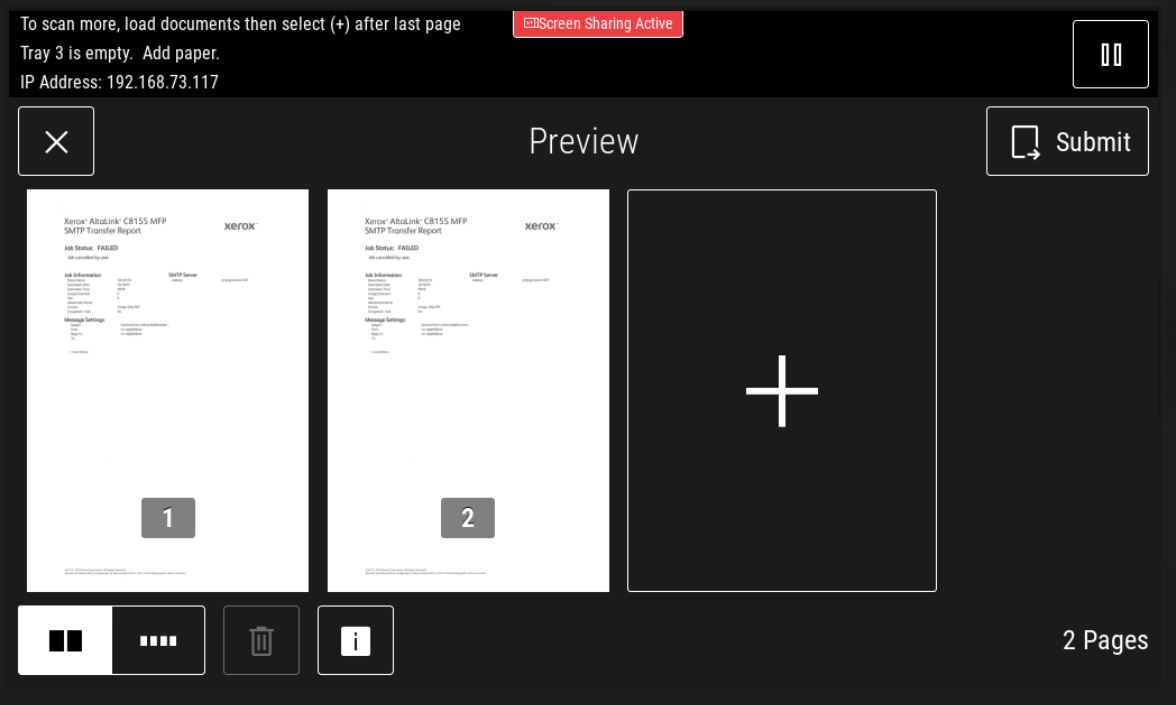
To **scan multiple pages** and create a single PDF without using the ADF, toggle the **Preview Mode**. The Send button will change to **Preview**. Press it to open the preview menu. Here, you can press on the big **+** to add and scan another page, reorder, or delete unwanted pages. Press **Submit** when ready to send the email.
If needed, you can ask the ADF to **scan both sides** of the documents by pressing the '**2-Sided Scanning**' option.
If you want to **create a searchable PDF**, in which you can select the text and copy-paste it, you can click on the “**.pdf**” button, select **More,** and in the **File Format** menu that pops up, select **Searchable - Yes**.
From the same menu, you can **change the type of file** to be attached to the email - '**.jpg**' is a picture and is usually smaller than a .pdf
If the copier has problems guessing the **content orientation** or the **size**, you can change it from “**Original Orientation**" and '**Original Size**,' respectively.
To enhance the scan further, scroll down, click 'Show Additional Features' and select a bigger 'Resolution.' Do not send too many high-**resolution** JPEG/PDFs simultaneously; the server will block the email because of the active size limitations. ETC.
| [](https://docs.isb.be/uploads/images/gallery/2023-10/Jk5qSRyrY6tpoUGQ-email.JPG)
[](https://docs.isb.be/uploads/images/gallery/2023-10/vdGGnxTQwEc1Oda1-preview.JPG)
[](https://docs.isb.be/uploads/images/gallery/2023-10/dt5IZqKhz4RG6qks-scan-options.JPG)
|