| [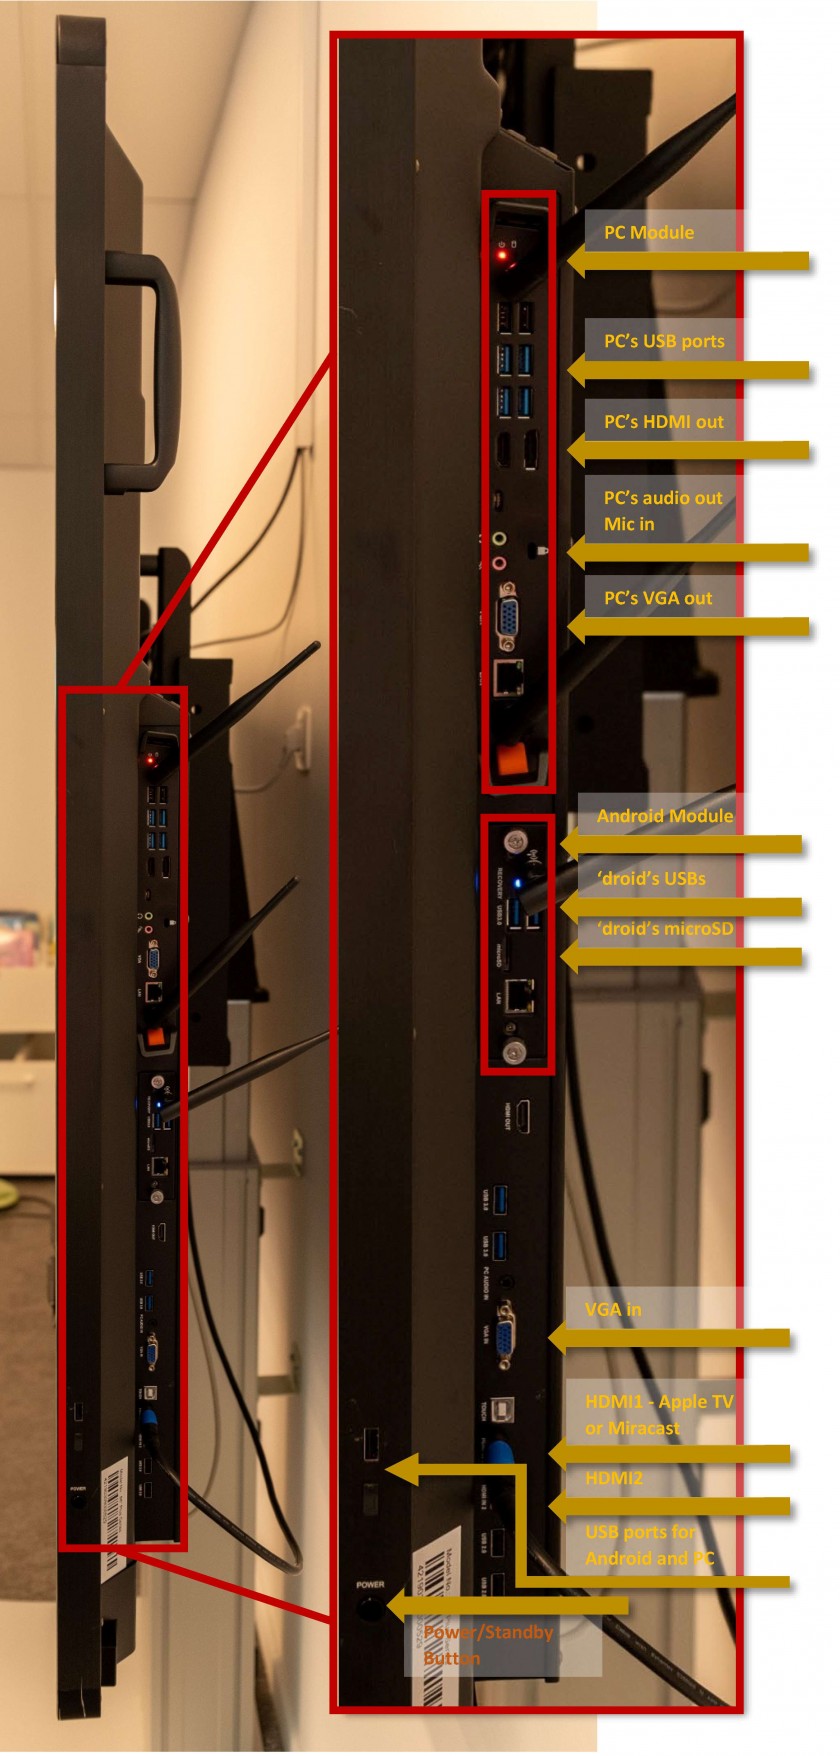](https://docs.isb.be/uploads/images/gallery/2019-08-Aug/ports2.jpg) | You can use the **PC**'s **module** ports to: - Connect any **USB** devices - like cameras, microscopes, microphones, etc. If a device is plugged in the **PC's USB ports** it will only be available for the PC - in Windows. If the device is compatible with both Android and Windows (ex. an USB flash drive) and you want to make the device available for both, please use the common **USB ports for Android and PC** that can be found above the power button, remove the plastic cover if needed. - Connect non USB headphones and microphones using the **audio** input/output. - Connect an external display using either the **PC's HDMI** **out** or the **PC's VGA out** ports. You can use the **Android**'s **module** ports to: - Connect **USB** devices like USB flash drives. If a device is plugged in the **Android's USB ports** it will only be available for Android - Lux. To make the device available for both **Android and PC** please see above. - Connect an **microSD** card. You can use the **ID**'s ports to: - Connect a computer, laptop, tablet, etc. to mirror or extend the screens of these devices using the **VGA in** or the **HDMI2** ports. Use the [**ID**'s **Menu**](https://docs.isb.be/books/isb-repository/page/hardware-introduction-%28the-screen-itself%29) to change the input as needed to HDMI2 or VGA. The HDMI1 port is usually used by the Apple TV or the Miracast devices. - Connect USB devices to the common **USB ports for Android and PC.** If the device is compatible with both Android and Windows (ex. an USB flash drive) please use these USB ports, remove the plastic cover if needed. |
| Make sure that the device (Mac, iPad, or iPhone) is connected to the ISB or the ISBConnect wireless network. | |
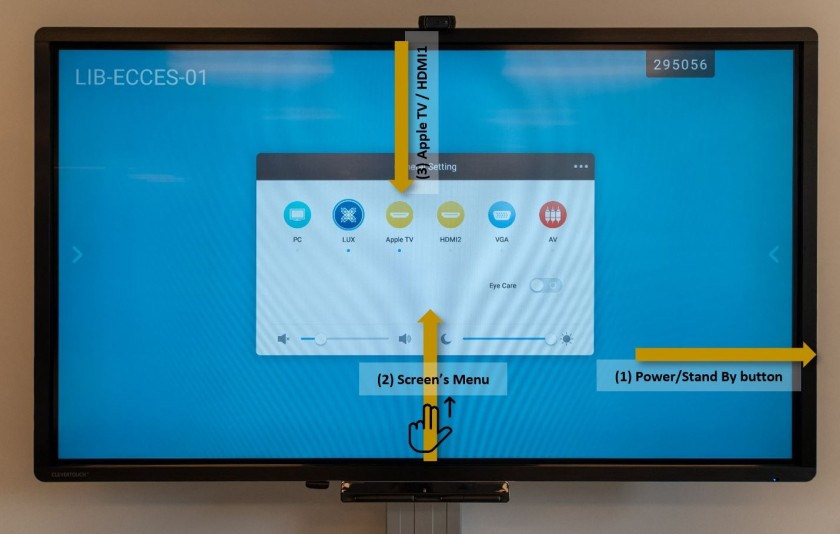
| Turn on the interactive display (1), swipe up from the bottom of the screen using 2 fingers to raise the screen's menu (2), and select/switch to the Apple TV input (3). | |
| [](https://docs.isb.be/uploads/images/gallery/2019-08-Aug/connect_apple_tv.JPG) | 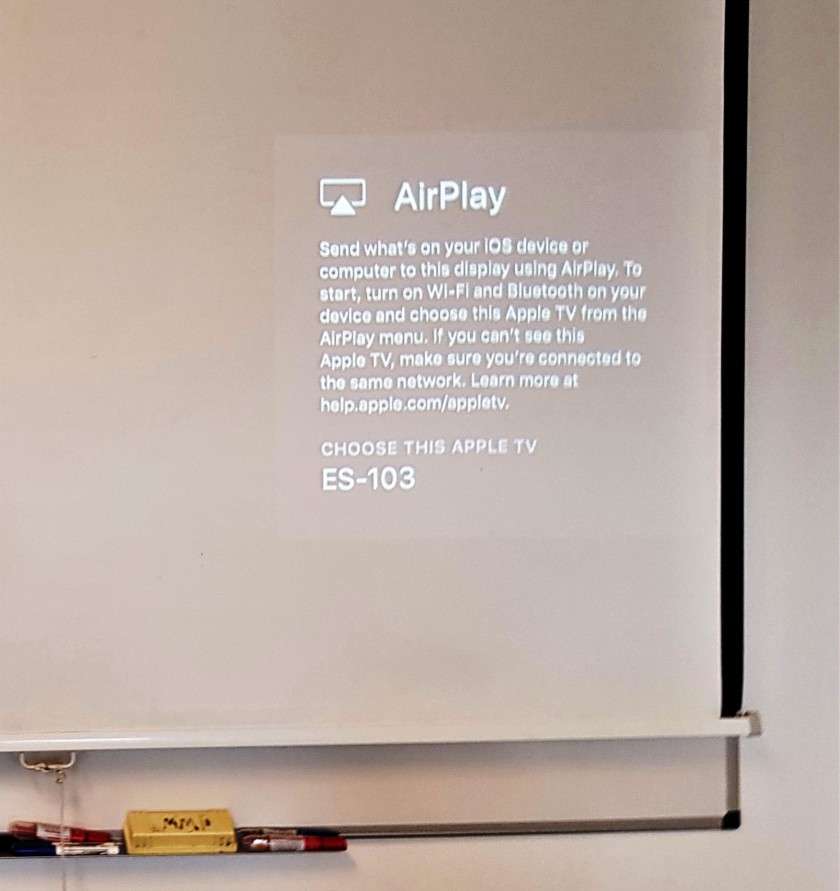 If instead of the usual AirPlay message, the screen states that is "Unable to detect the input signal," it means that the AppleTV is on stand by - check the room number, find the AppleTV in the list, and connect- it should wake up; once clicked. |
| On a MacBook click on the Control Center icon on the upper right side of your menubar and then on Screen Mirroring. Select from the rolling list the correct AppleTV – usually named after the room number. In this example, ES-103. [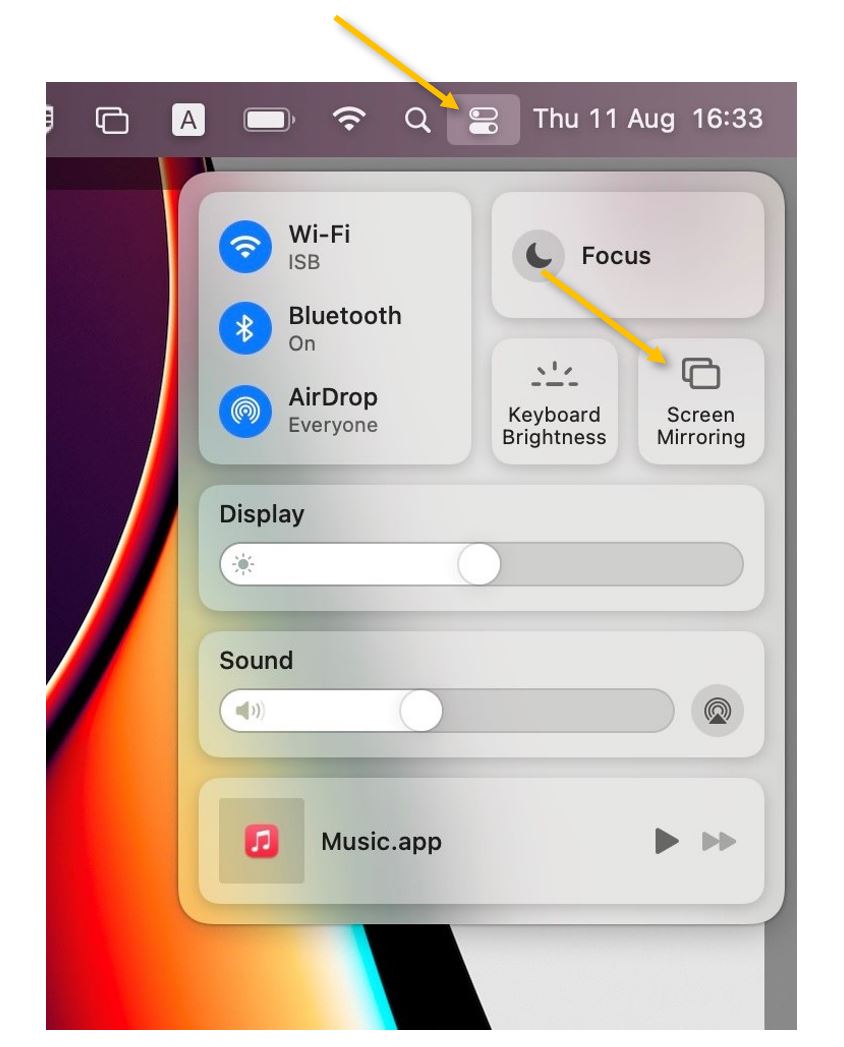](https://docs.isb.be/uploads/images/gallery/2022-08/MoCZEGzC4vov50bf-mac-connect.JPG) | On an iPad/iPhone, swipe down diagonally from the upper right corner onto the screen to bring up Control Center. Press on the Screen Mirroring button and, on the menu that pops up, select the correct AppleTV – usually named after the room number. In this example, ES-103. [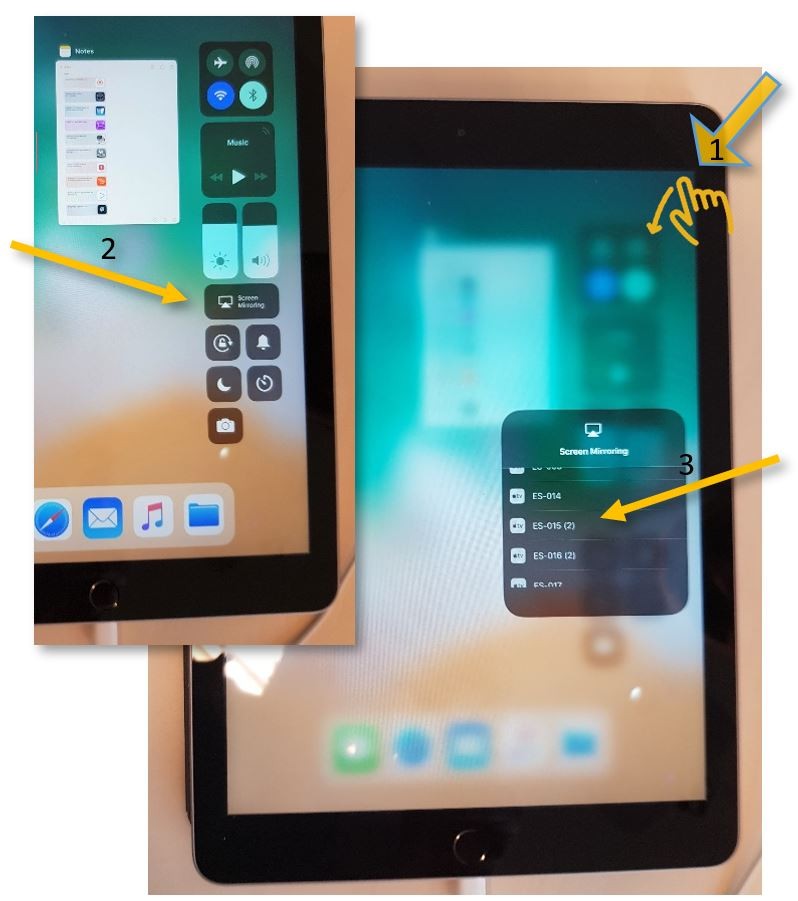](https://docs.isb.be/uploads/images/gallery/2019-08-Aug/connect_iPad.JPG) |
| If it’s the first time you connect this particular device to the interactive display, you will be asked to pair the devices – please insert the number that will pop up on the screen, and you should be ready to go. [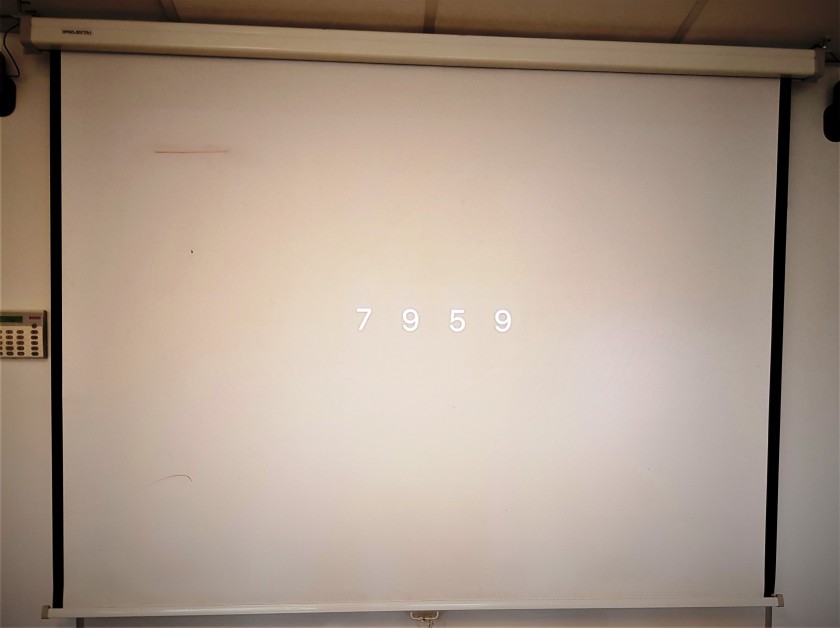](https://docs.isb.be/uploads/images/gallery/2018-10-Oct/pair-devices.jpg) | If the projected text is too small for the students or on your screen, you can open the System Preferences menu, click on Displays, and, in the new pop window, select Scaled and 720p or respectively Optimize for: built-in display [](https://docs.isb.be/uploads/images/gallery/2018-10-Oct/Sistem-preferences_1.jpg) |
| Make sure that the Windows or Android device is connected to the ISB or the ISBConnect wireless network. |
| Turn on the interactive display (1), swipe up from the bottom of the screen using 2 fingers to raise the screen's menu (2), and select/switch to the HDMI 1 input (3). [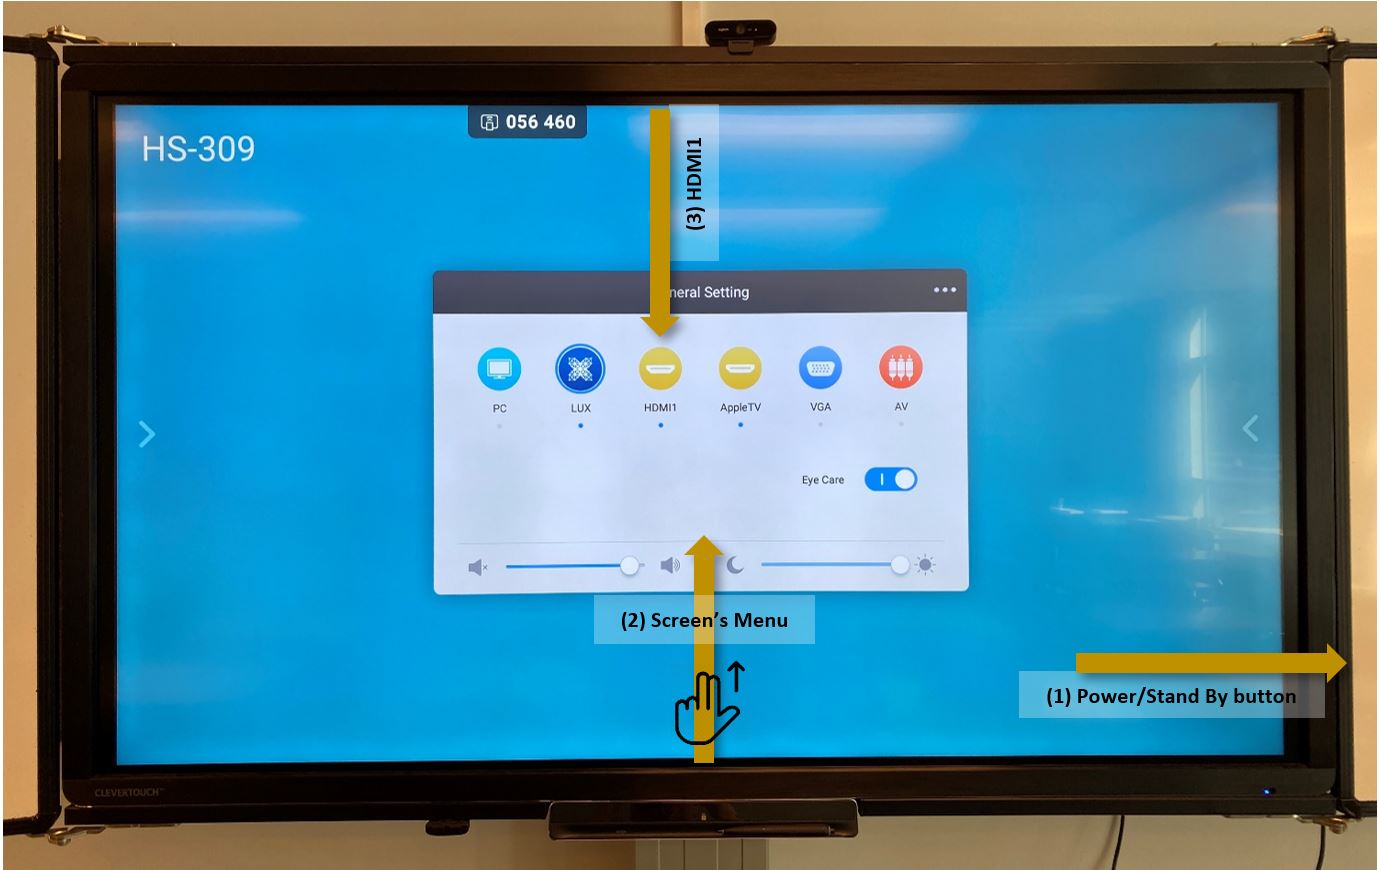](https://docs.isb.be/uploads/images/gallery/2022-08/AUynuj0neHUkI2t2-connect-to-miracast.JPG) |
| Wait for this screen to show up [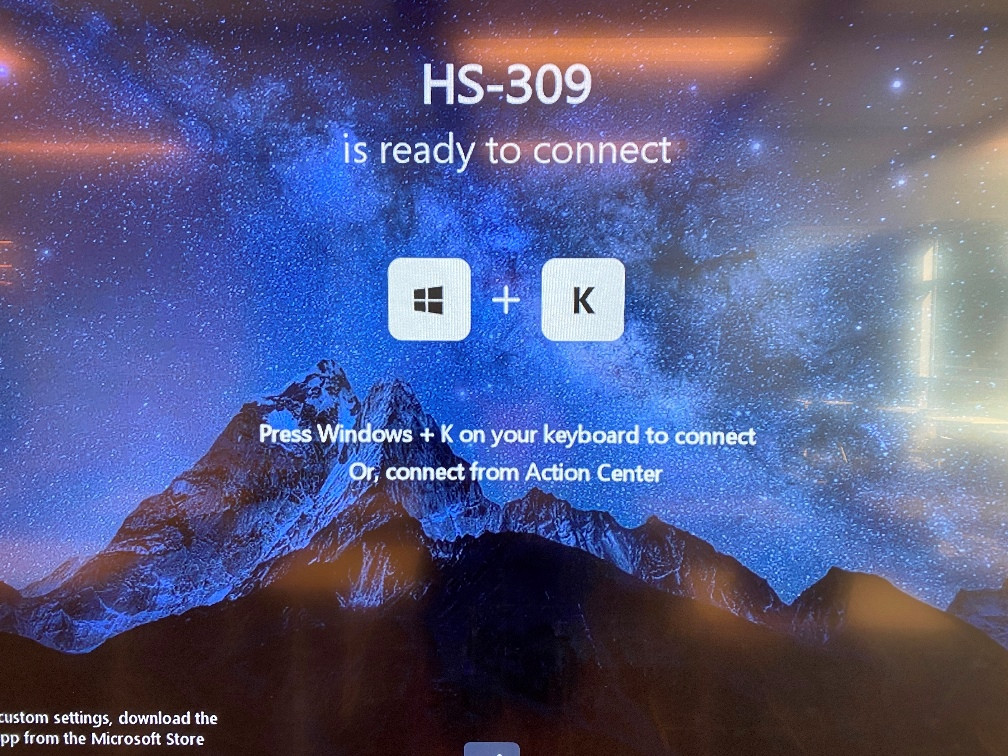](https://docs.isb.be/uploads/images/gallery/2022-08/dIXuLTt6koHBfz5H-img-4087b.JPG) |
| Press the **⊞** Windows button and K at the same time. In the list that pops up, find and connect to the correct device - in this case, HS-309. You should be ready to go. [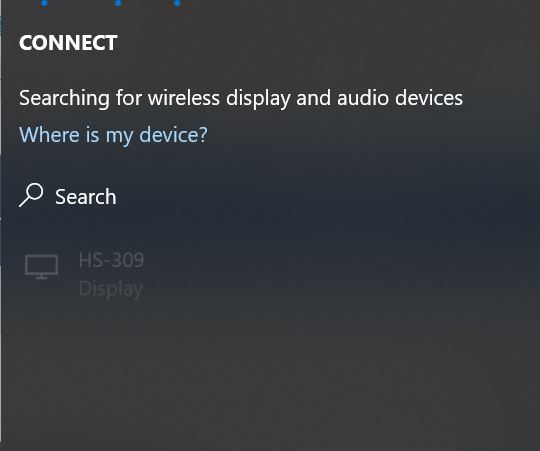](https://docs.isb.be/uploads/images/gallery/2022-08/BRyZeB19ULTd2SzS-windowsk.JPG) |