LS Student Printer - Mac - installation and tips
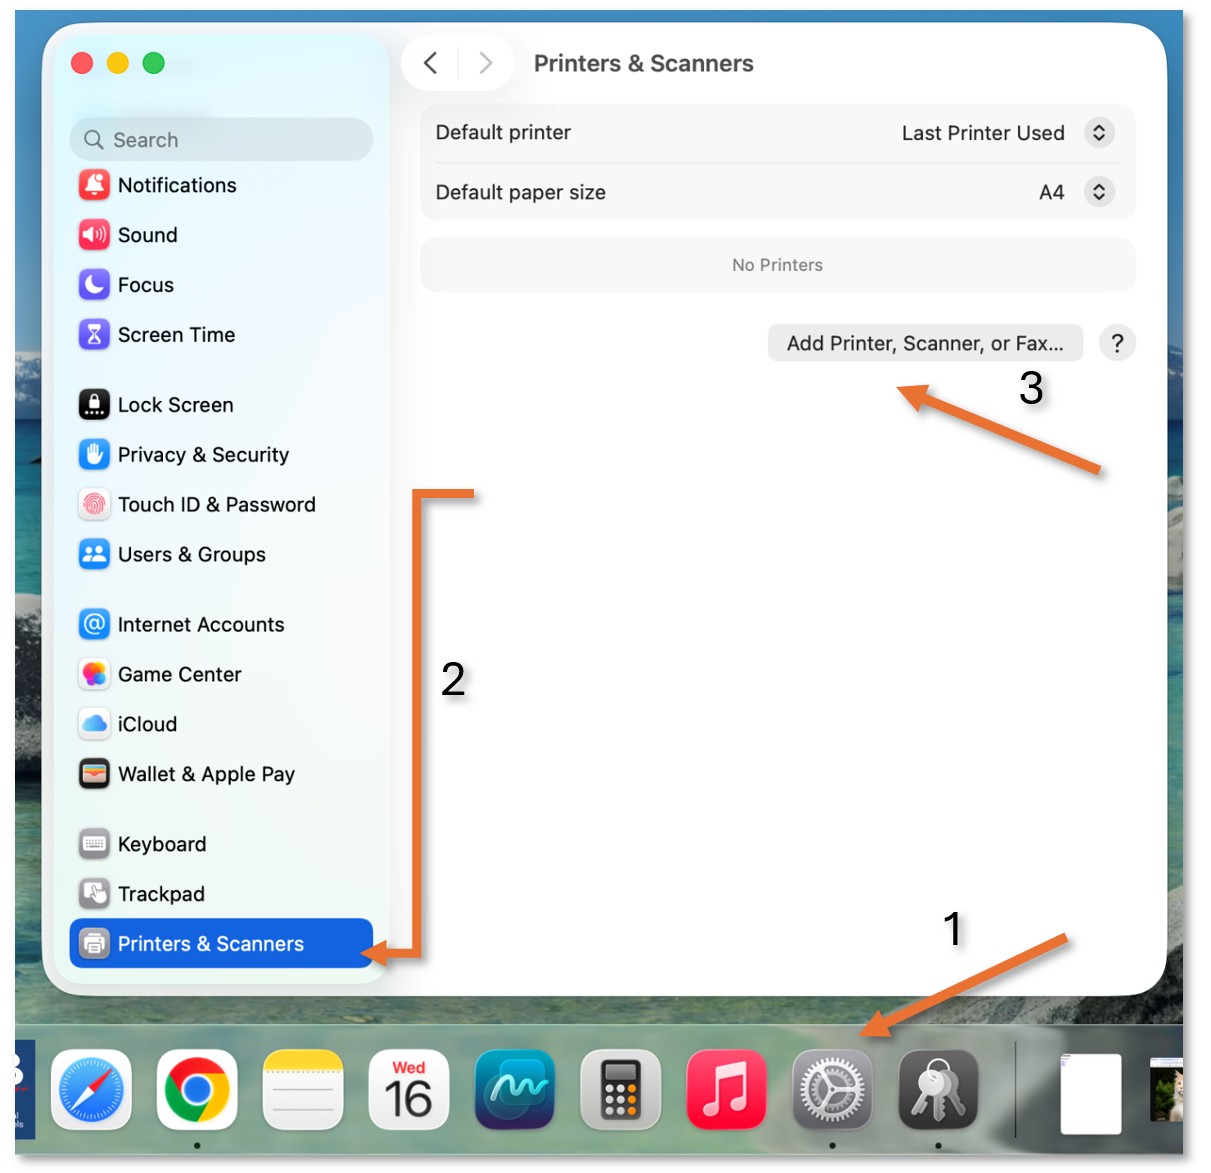
To print from a Mac, we first need to install the printer. Open System Settings (1), then scroll down to the end of the left option panel and select Printers & Scanners (2). Click on Add Printer (3)
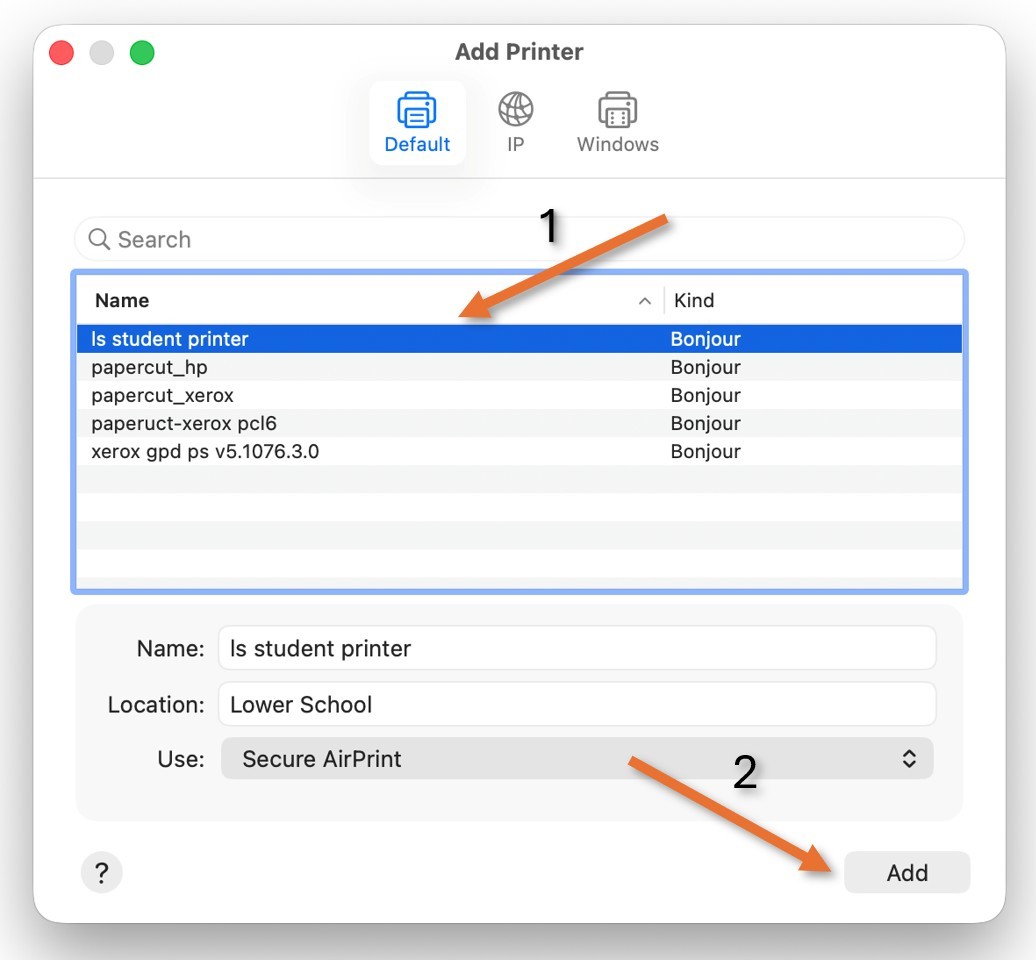
Select the ls student printer (1), and then Add (2)
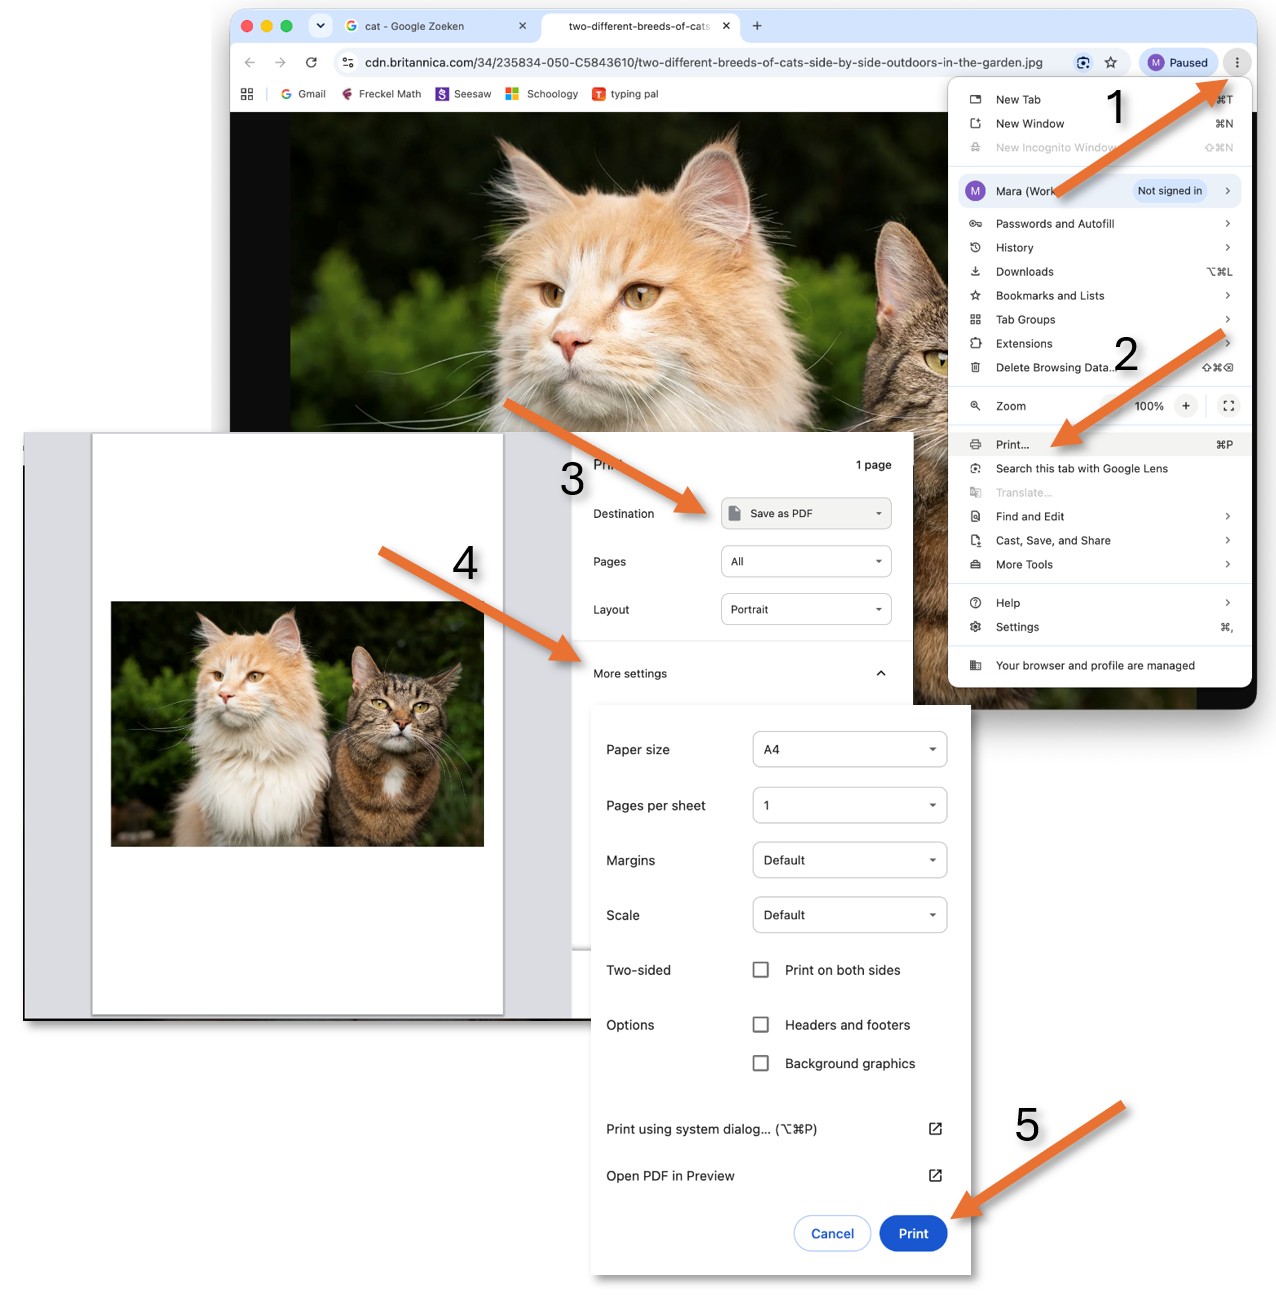
Now that the printer is installed, we can open Chrome, for example, open the print menu (1,2), select the new printer, and print.
Under Destination (3), click on See more and select the newly installed printer. Before printing, make sure that all the settings are correct. Do you need to print all the Pages? If you think the data will fit better in landscape, change the Layout. Open More settings and make sure that the Paper Size is A4. If you print a different size, the printer will present an error - it only has A4 paper in its trays. Sometimes a photo or table is too big; adjust the Margins or the Scale so it fits on one page. Save paper by Printing on both sides when possible. Uncheck Headers and footers if you don't want the website details printed. Press Print (5) when done.
Chrome remembers what you adjusted last time - make sure to check your settings for every print; not all prints are the same.
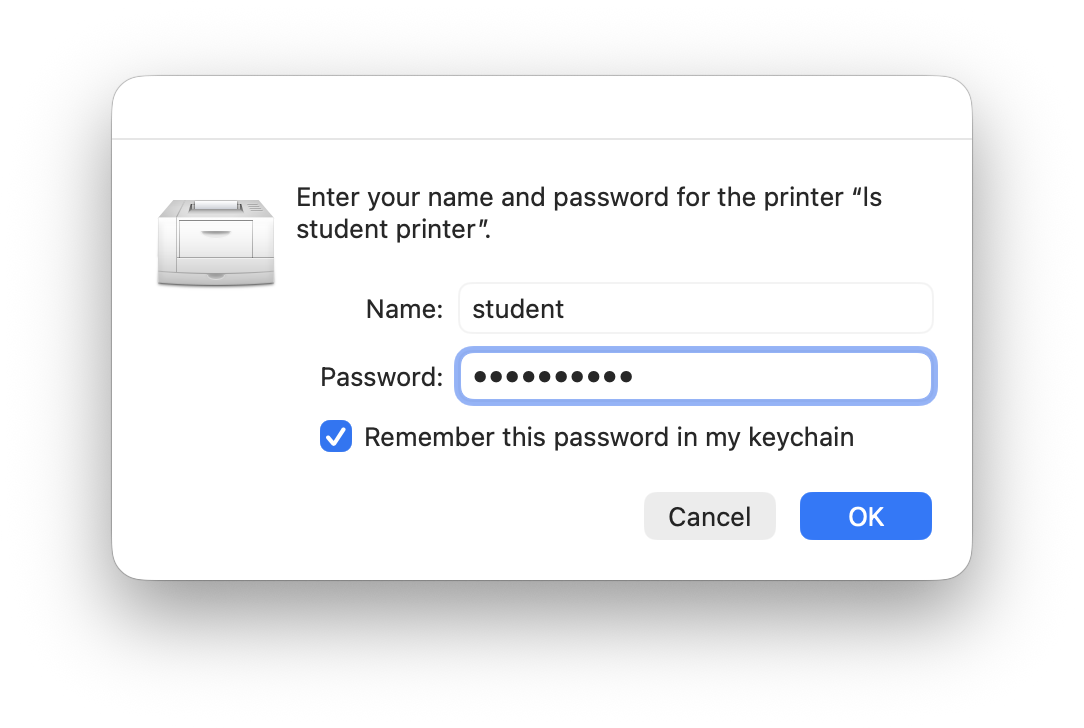
The first time you print, you will be asked to enter a Name and a Password.
The name is: student
The password is: printprint
Make sure to check "Remember password" before pressing OK.