Xerox Copiers - Booklets
Please keep in mind that not all copiers are created equal; only some of them can make a booklet, perforate, staple, or fold your print/copy job. However, if the nearest copier cannot do what you have in mind, do not fret. Print the job and find the closest copier with the capabilities you need. No matter where you print, the job will be visible on any of the school's copiers when you log in:
|
Location |
Hole Punch |
Staple |
Folding / Booklet* |
|
Annex 2nd Floor |
no |
yes |
no |
|
Blue Gim GO |
no |
yes |
no |
|
Chateau 1st Floor |
yes |
yes |
no |
|
Chateau Comm. Off. |
no |
no |
no |
|
ECC Ground Floor |
yes |
yes |
yes |
|
ES Ground Floor |
yes |
yes |
yes |
|
ES Second Floor |
no |
yes |
no |
|
HS Ground Floor |
yes |
yes |
yes |
|
ICC Ground Floor |
yes |
yes |
yes |
|
Metairie Ground Floor |
no |
yes |
no |
|
MHS Lib. 1 |
yes |
yes |
yes |
|
MHS Lib. 2 |
no |
no |
no |
|
Chalet |
no |
yes |
no |
*Almost all the copiers in the school can print or create a booklet, but only a few can fold it and staple it.
** If you need to create more than 10 booklets, please use the copiers outside the MHS library or plan your printing with the schools' GOs. When creating booklets, the copiers must print on both sides, fold, and staple. This could take a long time, and nobody else would be able to use them.
How to Create Booklets from the:
Copier:
Sign in, place the originals in the Automatic Document Feeder, choose Copy, and scroll down to see the options. The default copy mode is black and white; if needed, please change it to Color from the Output Colour option.
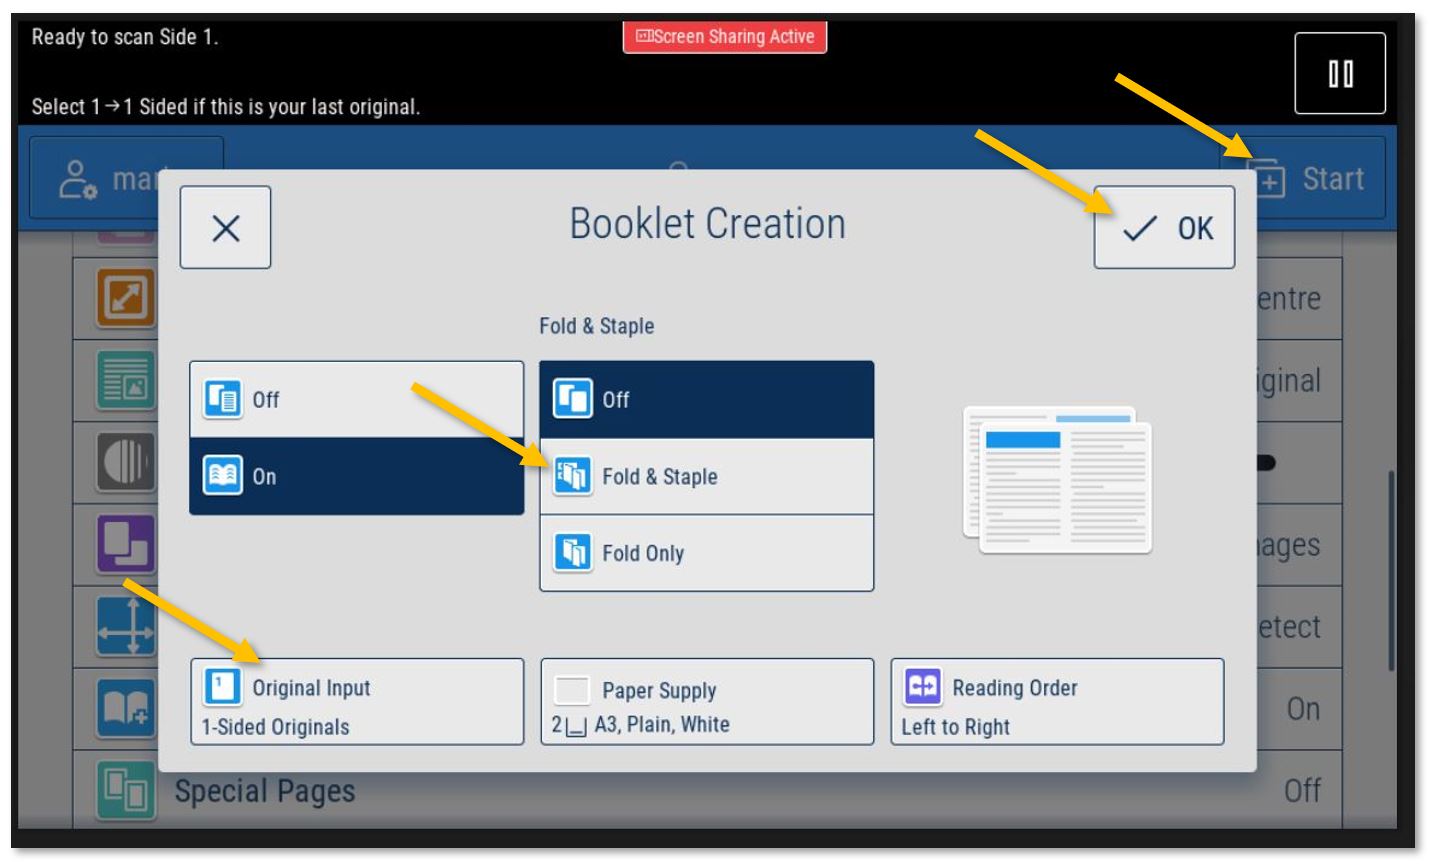
Select the Booklet Creation option and More. In the pop-up window - On and OK. Then, choose the paper size that you want to use. If A4 is chosen the resulting booklets will be A5. With A3, the booklets will be A4. Press OK again.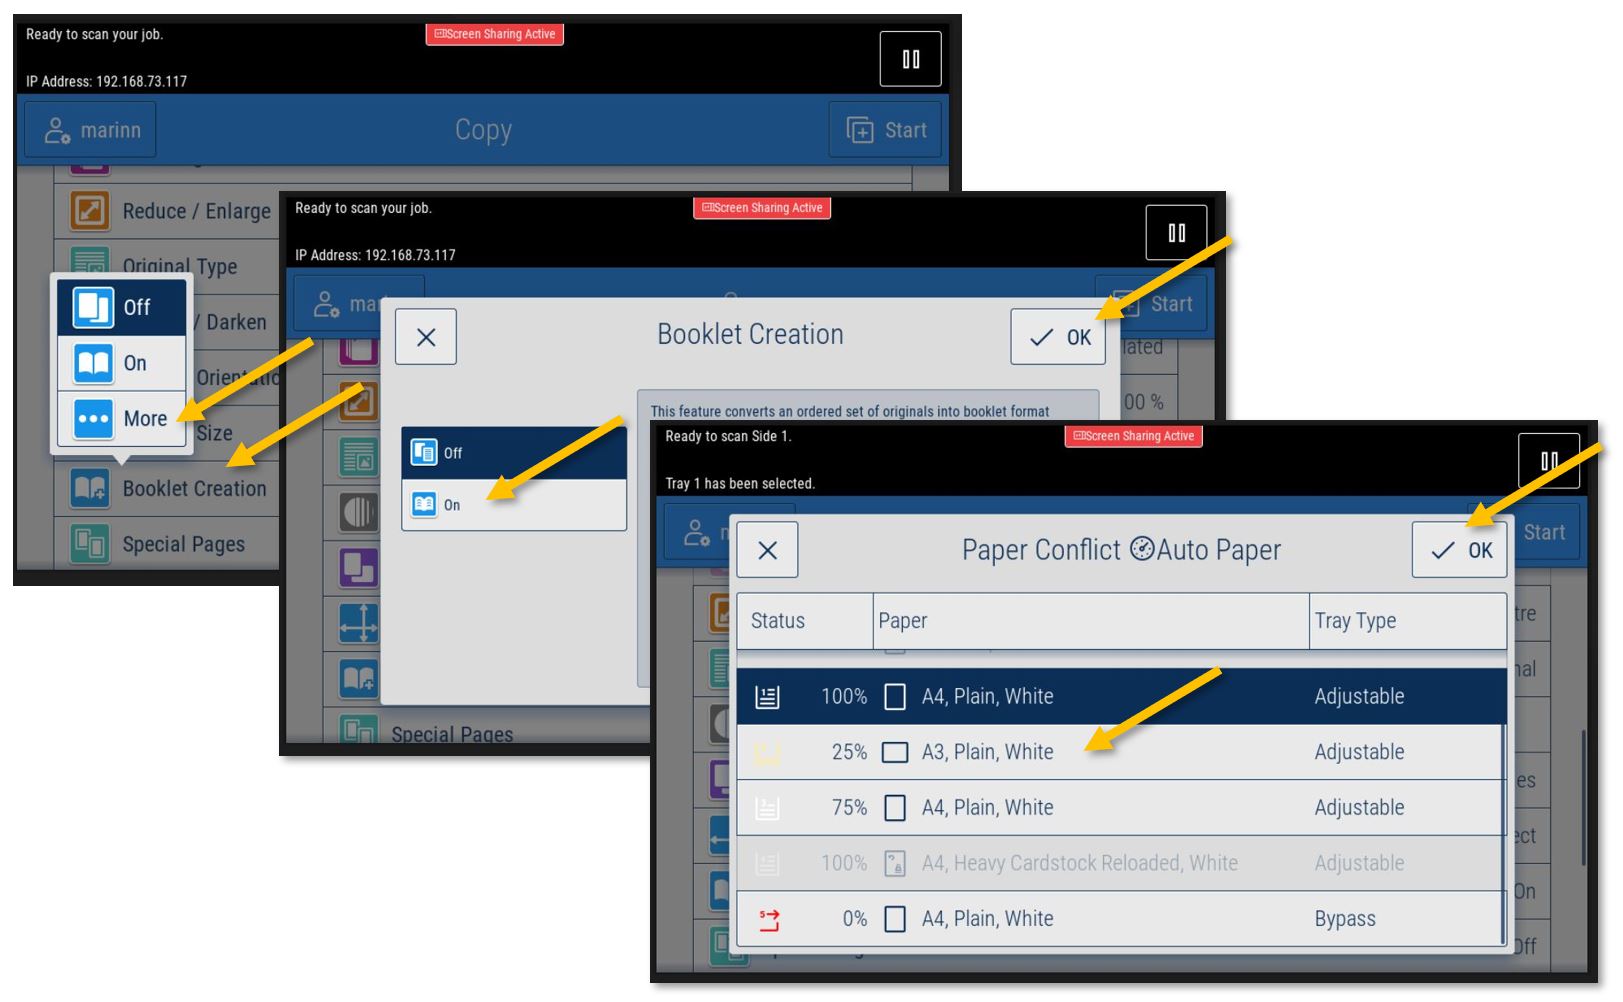
Mac:
(If you print from a Windows machine, please jump to the next section.)
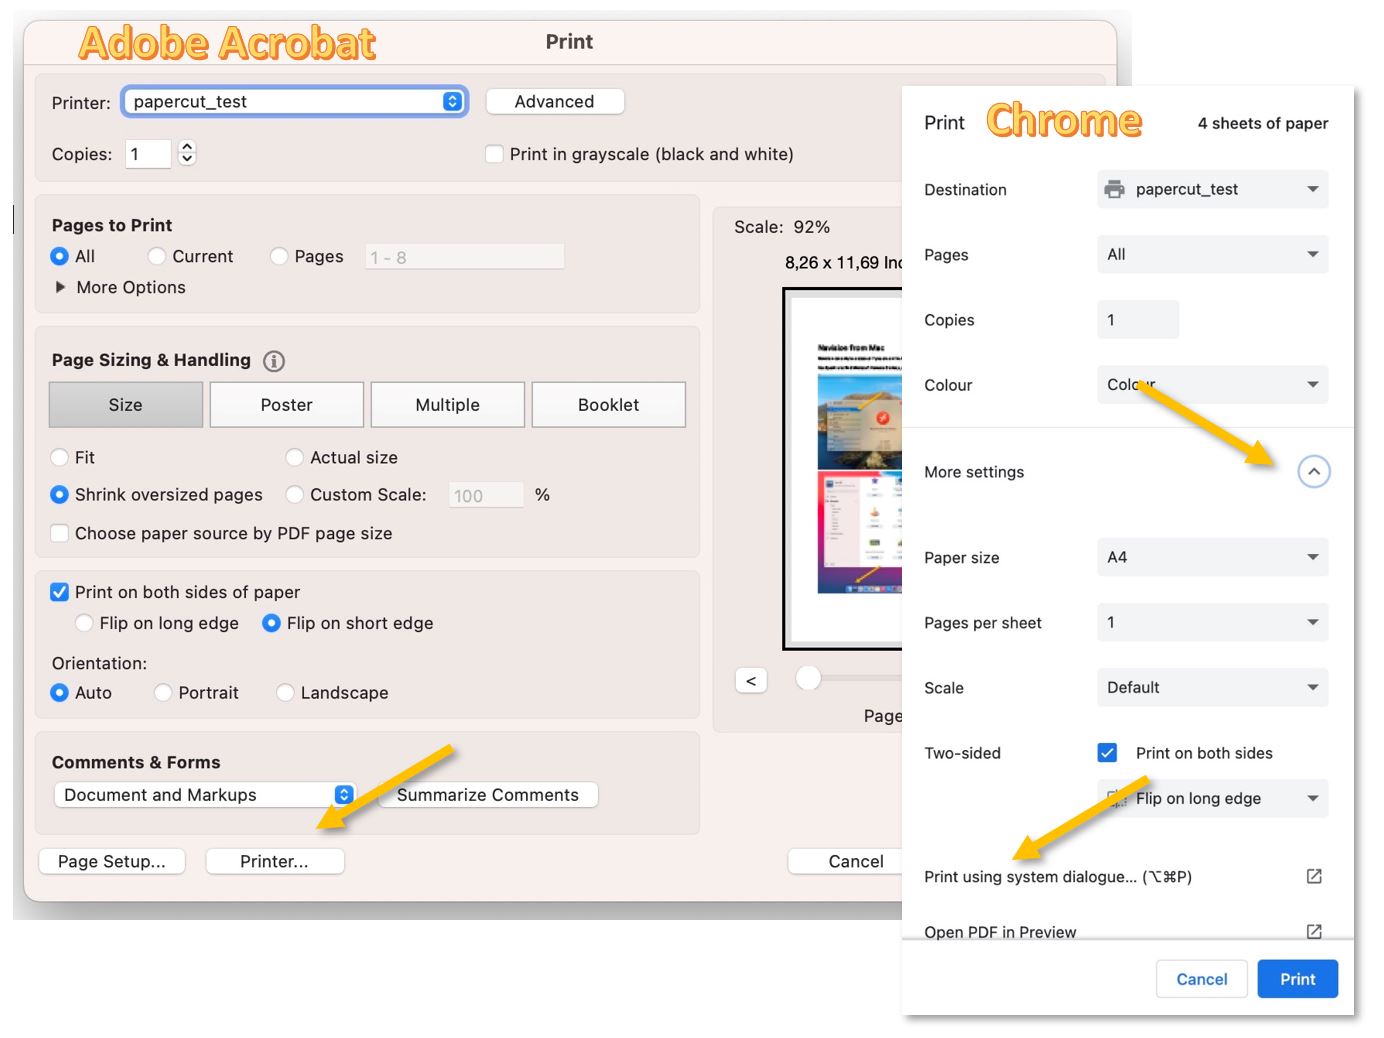
Most apps cannot access the booklet menu directly. After pressing print, we must find the printer settings in the print menu. In Adobe Acrobat, for example, we need to press on 'Printer...'; in Chrome, 'More settings' and 'Print using system dialog'.
In the new pop-up window, scroll down to 'Printer Options', extend it, and select Xerox Features. Click on the 'Finishing' box and select from the drop-down list 'Booklet Creation...'
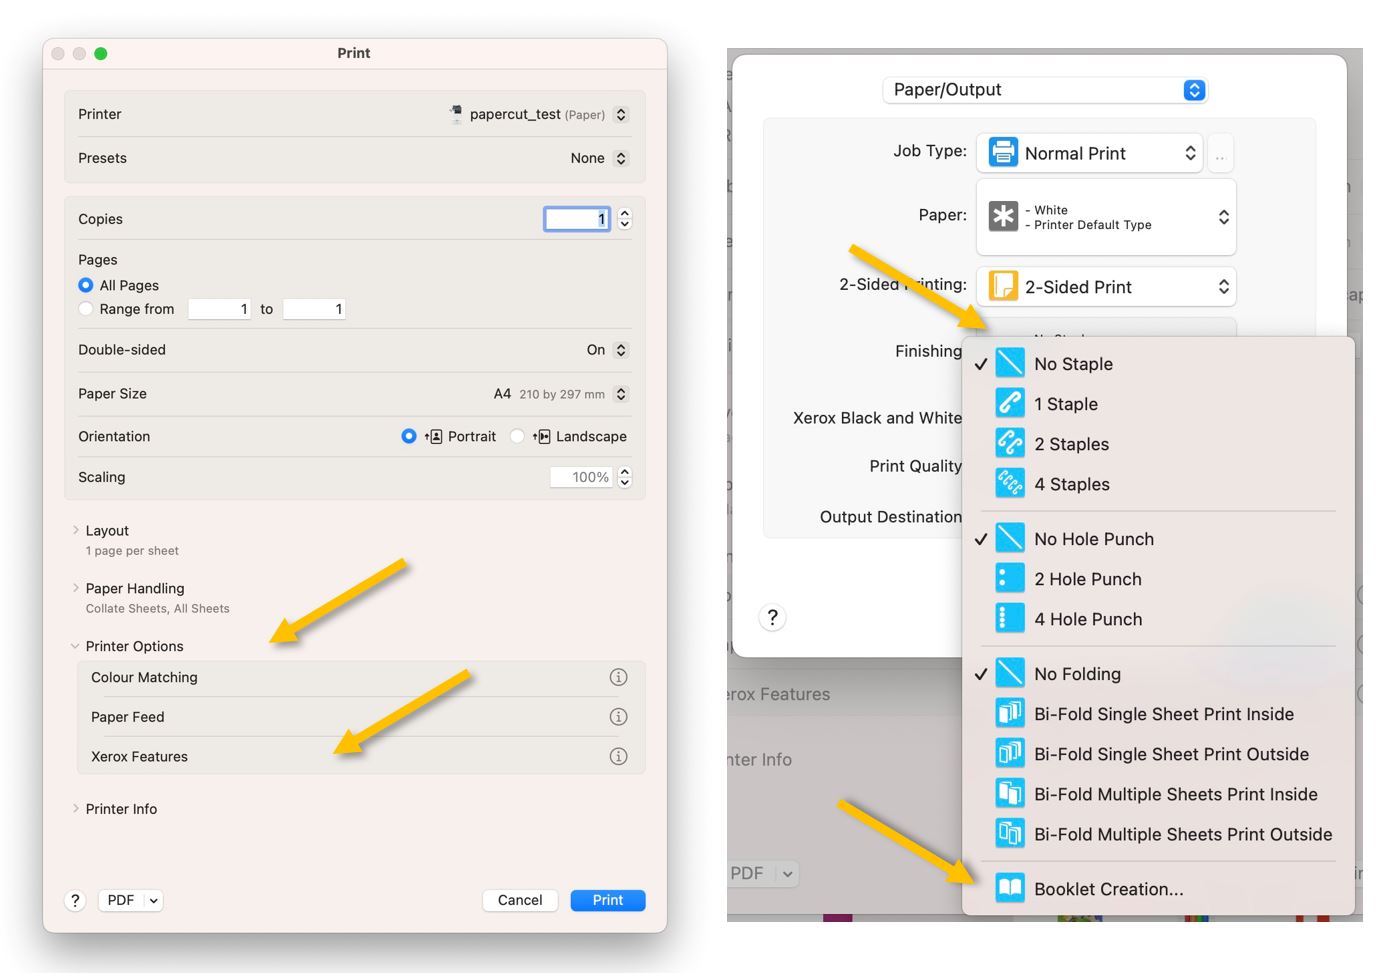
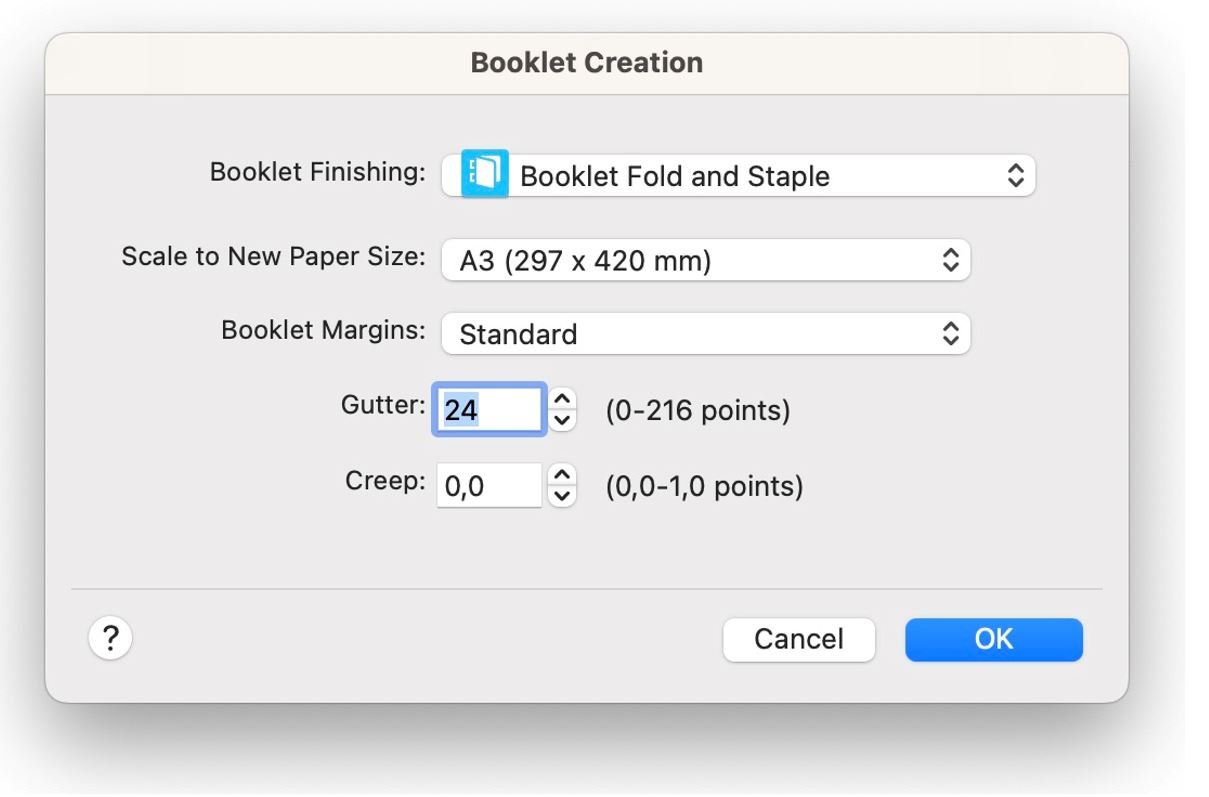
In the 'Booklet Creation' menu, select the appropriate 'Booklet Finishing' for your case, usually 'Booklet Fold and Staple' and, from 'Scale to New Paper Size:' the paper size to be used. Usually A3 (for A4 booklets). A4 (for A5 booklets).
Press 'OK', then 'Print' and 'Print' again to send the job to the copier.
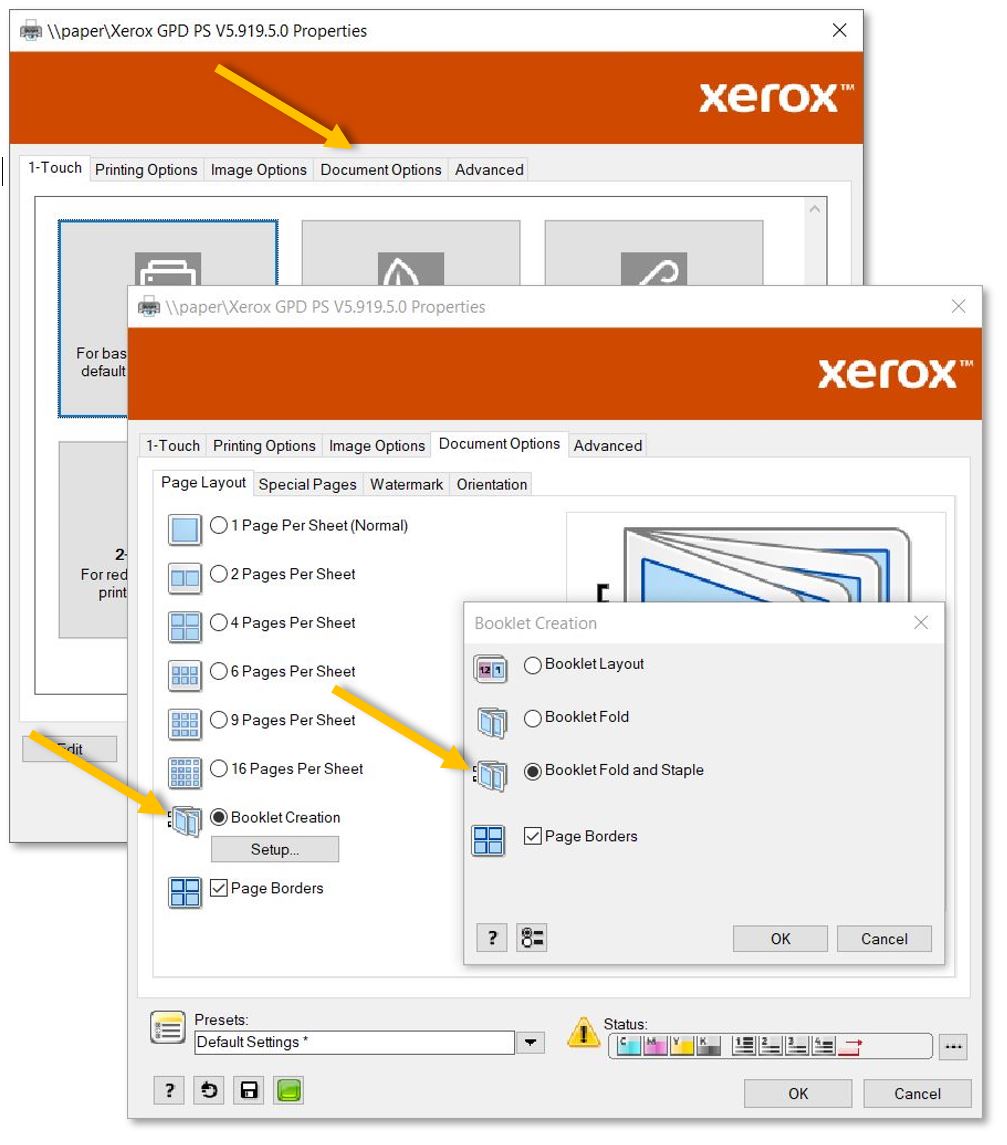
Windows:
Most apps cannot access the booklet menu directly. After pressing print, we must find the printer settings in the print menu. In Adobe Acrobat, for example, we need to press on 'Printer...'; in Chrome, 'More settings' and 'Print using system dialog...'; in Word, 'Printer Properties.'
Press 'OK', 'OK' again, and 'Print' to send the job to the copier.