Xerox Copiers - Enlarge/Reduce
From Copier:
Sign in, place the originals on the glass, and choose Copy. Scroll to 'Reduce / Enlarge' and select 'Auto' from the pop-up menu.
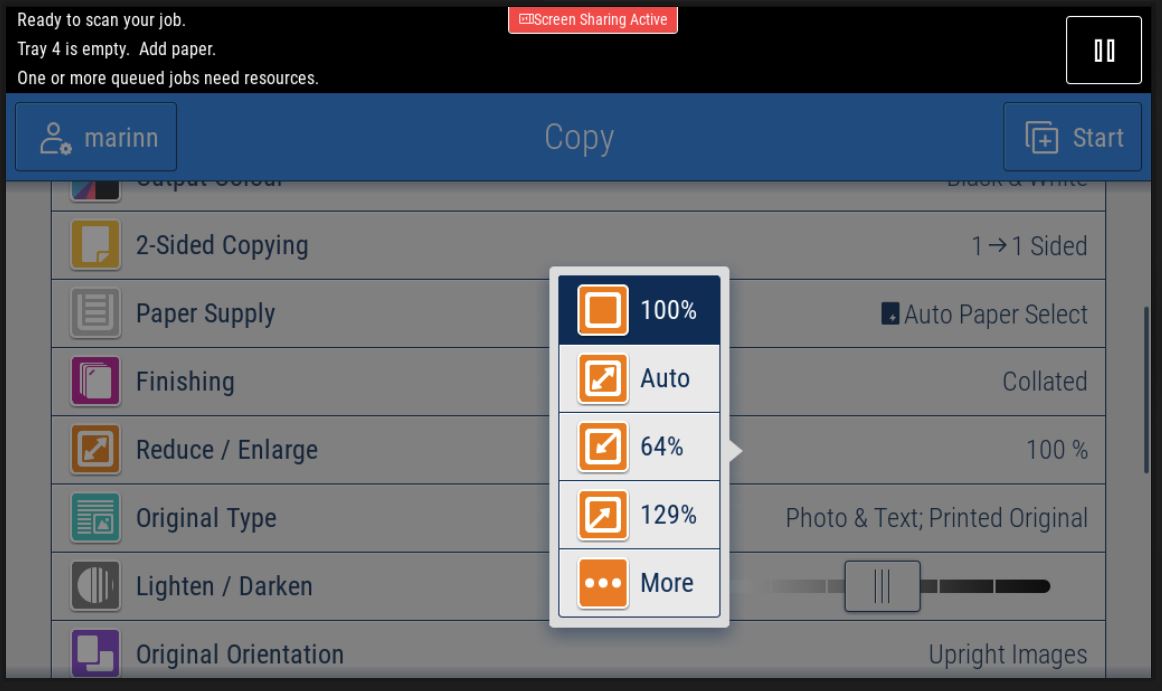
Select the needed size from the following menu - usually A4 or A3 - press OK and Start.
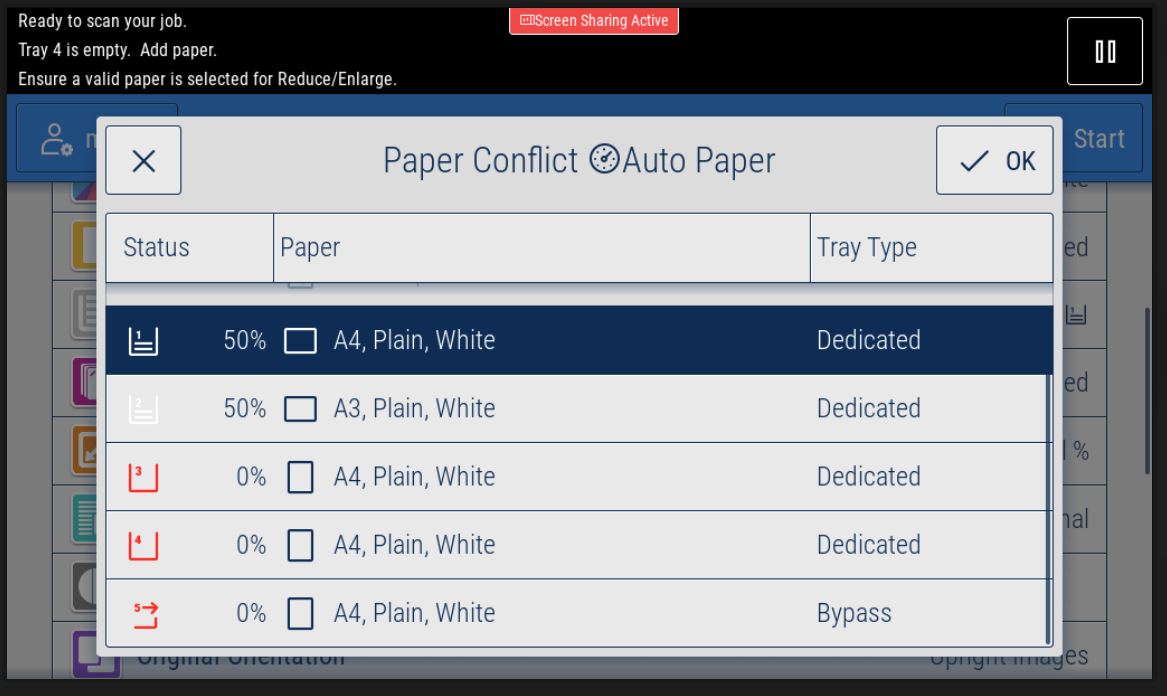
If you need a different size than the copier usually has in one of its trays, for example, A5, you will have to open the side tray and place A5 paper in it (not the X one, the one underneath). The copier will try to guess what type of paper you added - correct it if it chooses wrong.
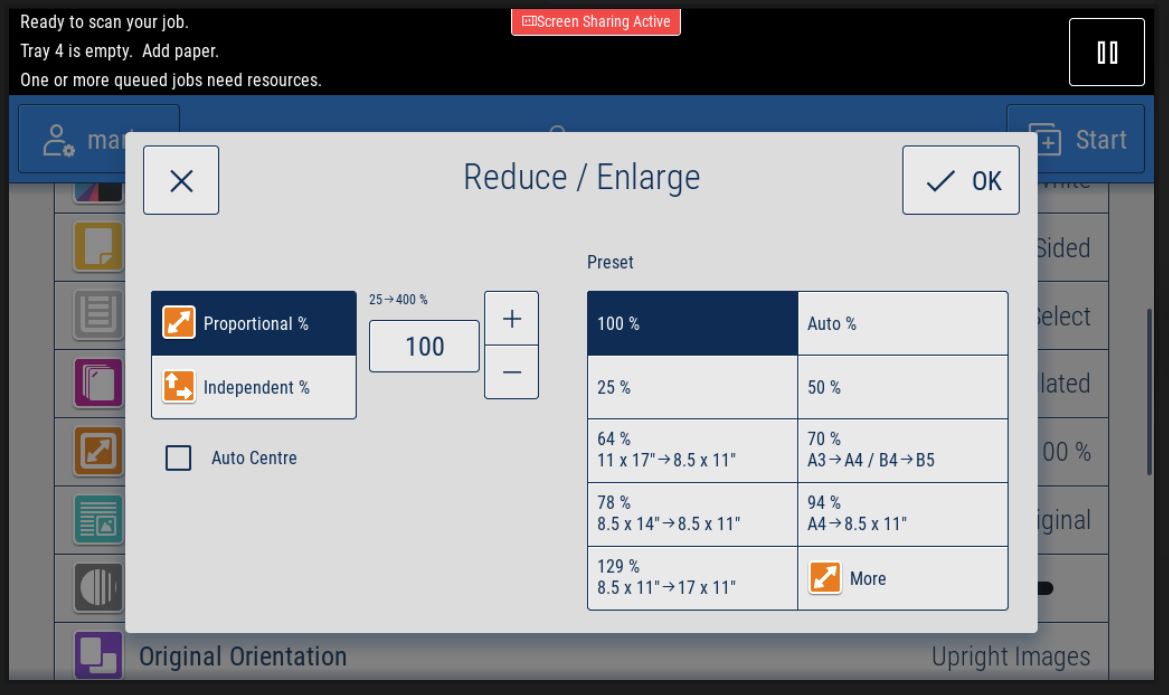
In the rare cases when the copier does not recognize the size of the original, or you want to extend/reduce the scanning area, please select 'More' instead of 'Auto' after selecting the 'Reduce / Enlarge' options. In the occurring menu, you can play with the percentages or select a premade preset - for example, from A3 to A4 or from A4 to letter (8.5x11).
From Windows: (If you print from a Mac, please jump to the next section)
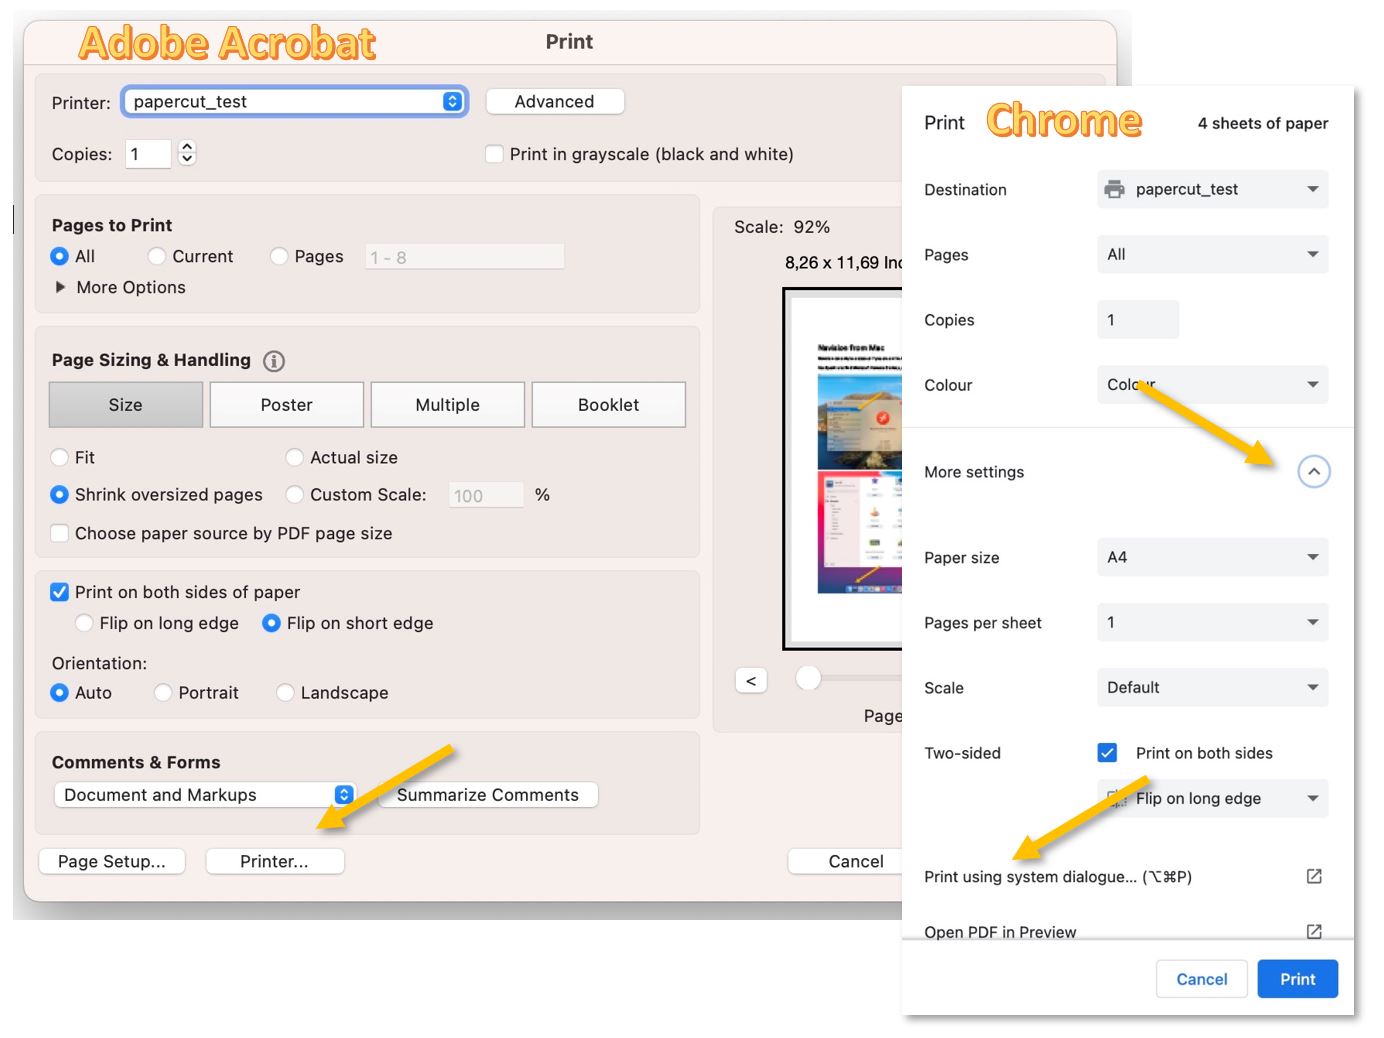
Most apps cannot interact with the copier's menu directly. After pressing print, we must find the Xerox settings in the print menu. In Adobe Acrobat, for example, we need to press on 'Properties...'; in Chrome, 'More settings' and 'Print using system dialog...'; in Word, 'Printer Properties.'

If the Windows Print menu pops up á make sure that Papercut_Xerox is selected and click on Preferences.
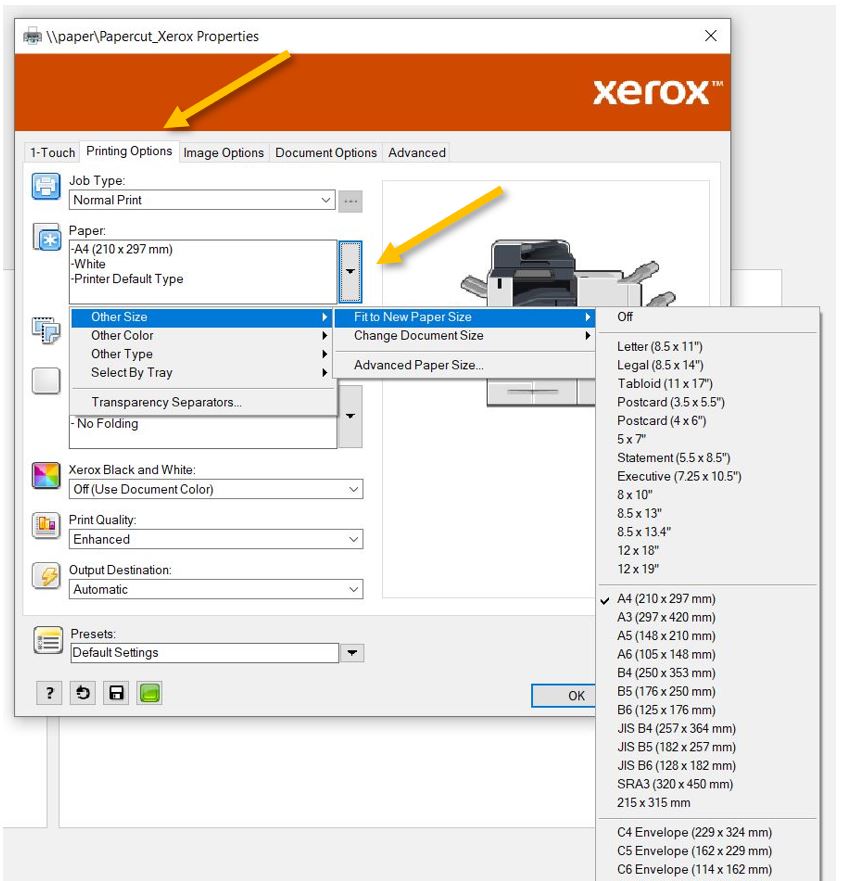
In the Xerox print menu, go to the Printing Options tab, extend the Paper menu, and from 'Other Size' - 'Fit to New Paper Size,' select the needed size. OK - Print - Print.
If you need a different size than the copier usually has in one of its trays, for example, A5, you will have to open the side tray and place A5 paper in it (not the X one, the one underneath). The copier will try to guess what type of paper you added - correct it if it chooses wrong.
From Mac:
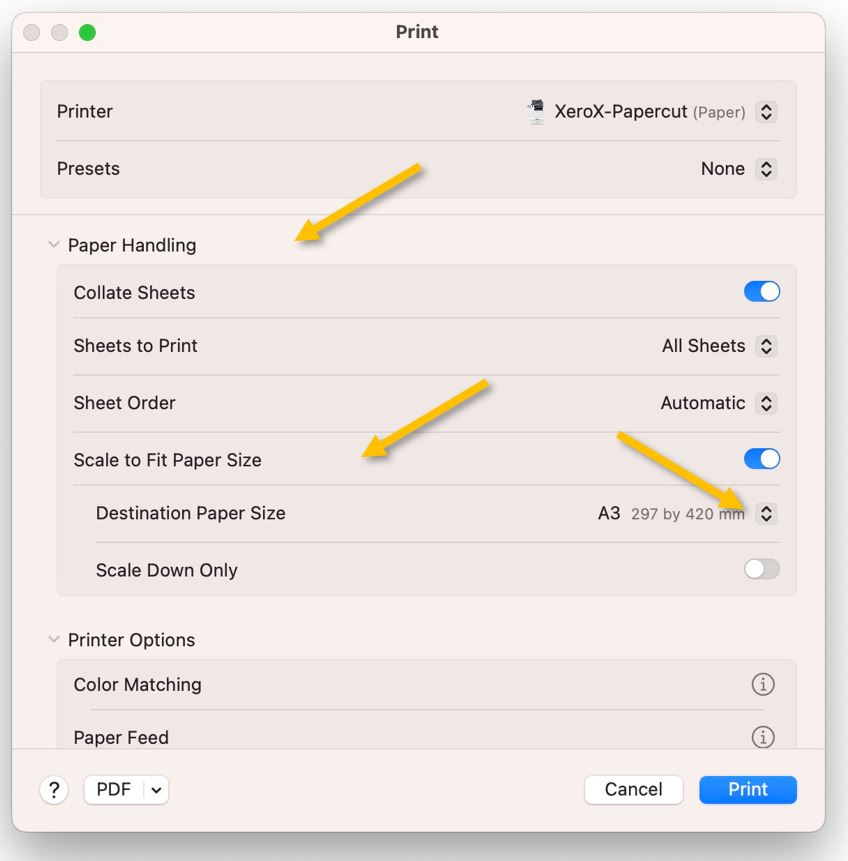
Most apps cannot interact with the copier's menu directly. After pressing print, we must find the printer settings in the print menu. In Adobe Acrobat, for example, we need to press on 'Printer...'; in Chrome, 'More settings' and 'Print using system dialog'.
In the new pop-up window, scroll down to 'Paper Handling,' extend it, and turn on 'Scale to Fit.' Under 'Destination Paper Size,' select the needed size.
If you need a different size than the copier usually has in one of its trays, for example, A5, you will have to open the side tray and place A5 paper in it (not the X one, the one underneath). The copier will try to guess what type of paper you added - correct it if it chooses wrong.